OpenMetal - A beginner's guide to Open Cloud

Passionate about DevOps, Kubernetes, Cloud-Native technologies, and Open Source, I specialize in building scalable, automated, and secure infrastructure solutions. With hands-on experience in CI/CD, Kubernetes, HashiCorp Vault, Terraform, Airflow, and cloud platforms, I aim to bridge the gap between development and operations.
Introduction
In simple terms, OpenMetal is a cloud-computing platform that provides open-source cloud solutions to run and manage services for your business. OpenMetal is a leading provider of open-source and Infrastructure-as-a-Service (IaaS). The strengths of public cloud, private cloud, and bare metal have been fused into an alternative cloud platform, powered by OpenStack, Ceph, and bare metal automation. OpenMetal allows companies of all sizes to realize new opportunities in performance, productivity, and profitability.
What are OpenStack, Ceph, and Bare-Metal?
To get started with OpenMetal, we need to get a bit of an overview of some of its core technologies.
OpenStack is a free and open-source software platform for cloud computing, mostly deployed as an infrastructure-as-a-service (IaaS). The software platform consists of interrelated components that control diverse, multi-vendor hardware and software into an integrated whole. If you want to get detailed knowledge, feel free to check out my blog on OpenStack.
So, you learned computing, but you need to know storage too. Here comes Ceph at your service. Ceph is a distributed storage system that provides object, block, and file system storage in a single platform. It was designed to provide excellent performance, reliability, and scalability. Ceph is widely used for storage in OpenStack clouds, as a hyper-converged storage solution, and for Big Data and backup applications.
Lastly, Bare metal refers to using physical servers without any virtualization layer. Bare metal servers use the physical hardware resources directly. No virtualization layer or hypervisor is managing the resources. Cloud providers offer bare metal as a service to provide on-demand, configurable physical servers in the cloud. This combines the benefits of bare metal with the agility of the cloud.
How does OpenMetal integrate such technologies into their Infrastructure?
OpenMetal provides private cloud infrastructure based on OpenStack running on bare metal servers. Here's how they integrate the different components:
OpenStack Deployment
OpenStack is deployed using Kolla Ansible, which uses Docker containers to run the various OpenStack services. This provides:
Isolated environments for each service
Scalability
Flexibility
Faster initialization
The initial deployment is done using an FM-Deploy container which handles provisioning and remains running to manage adding or removing nodes.
Ceph Storage
OpenMetal uses Ceph for all storage in the cloud. Ceph provides:
Object storage using RADOSGW (replacing Swift)
Block storage using RADOS Block Device and connected to Cinder
Data replication for high availability
Self-healing of data
Scalability to the petabyte level
The Ceph cluster is deployed across all control plane nodes. Each node has Ceph Monitor, Manager, Object Gateway, and Object Storage Daemon services running.
Ceph pools are used to logically divide the storage for different purposes:
imagespool for Glance imagesvolumespool for Cinder volumesvmspool for Nova instance volumes
Swift and Cinder connect directly to the Ceph cluster for object and block storage respectively.
Bare Metal Servers
OpenMetal runs OpenStack on bare metal servers to provide a private cloud infrastructure. The key benefits are:
Higher performance than virtualized infrastructure
More control over hardware
No performance overhead of virtualization
The NVMe drives on the bare metal servers are used to back the Ceph OSDs, providing fast storage for the cloud.
OpenMetal provisions and manages the bare metal servers, Kubernetes clusters, and OpenStack clouds for their customers.
Exploring OpenMetal with Hands-on
Let's get going with some hands-on training on OpenStack on OpenMetal. For prerequisites you just need to provide your corporate or college/university email address and some additional information. Also, you get a 32-hour free trial at OpenMetal.
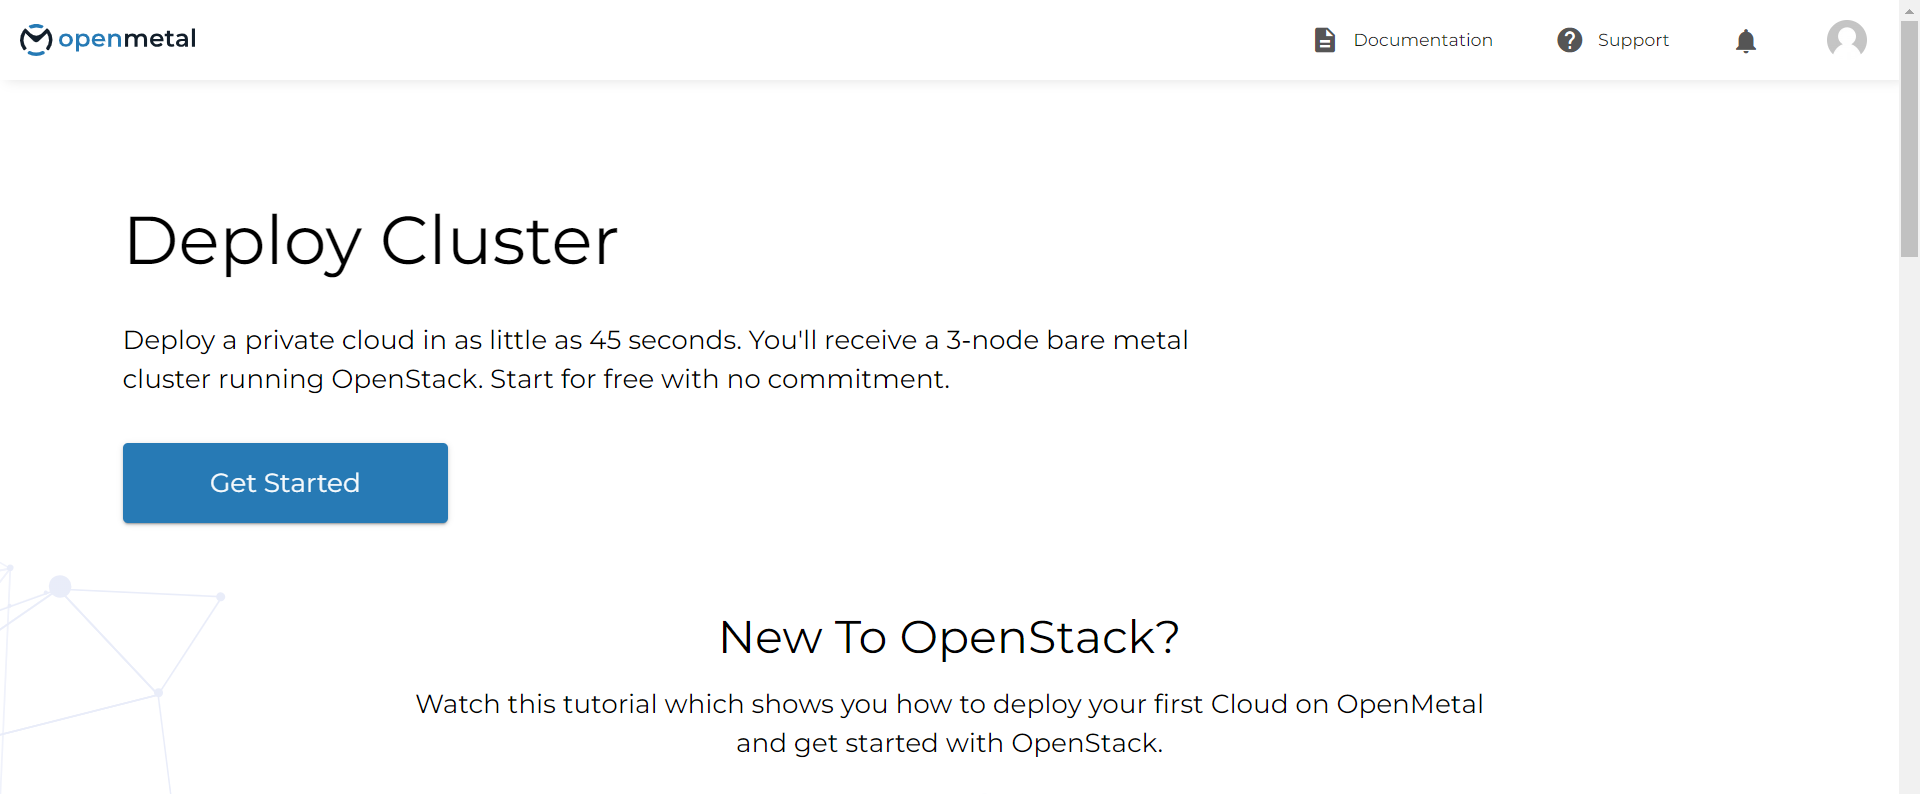
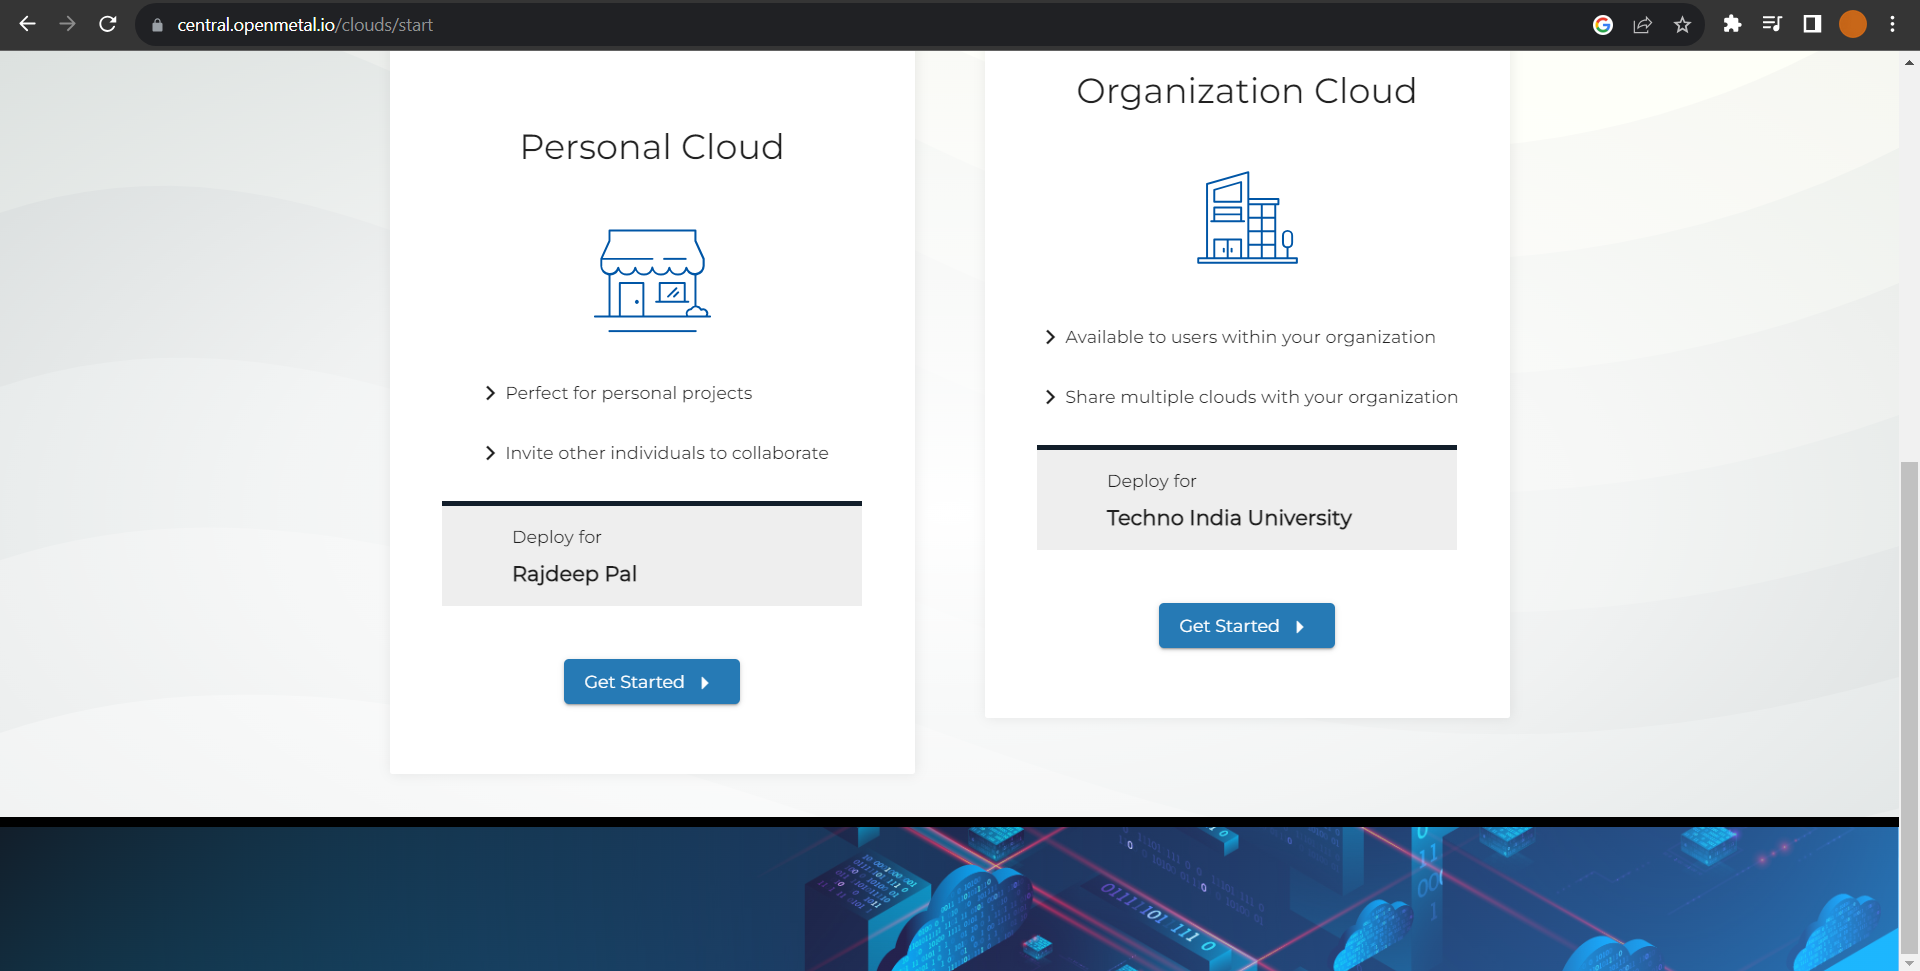
I hope you have created your account with OpenMetal successfully, let's "Get Started". Now, you get to choose from 2 options either for personal use or for organizational use. Let's start with Personal Cloud, taking one step at a time.
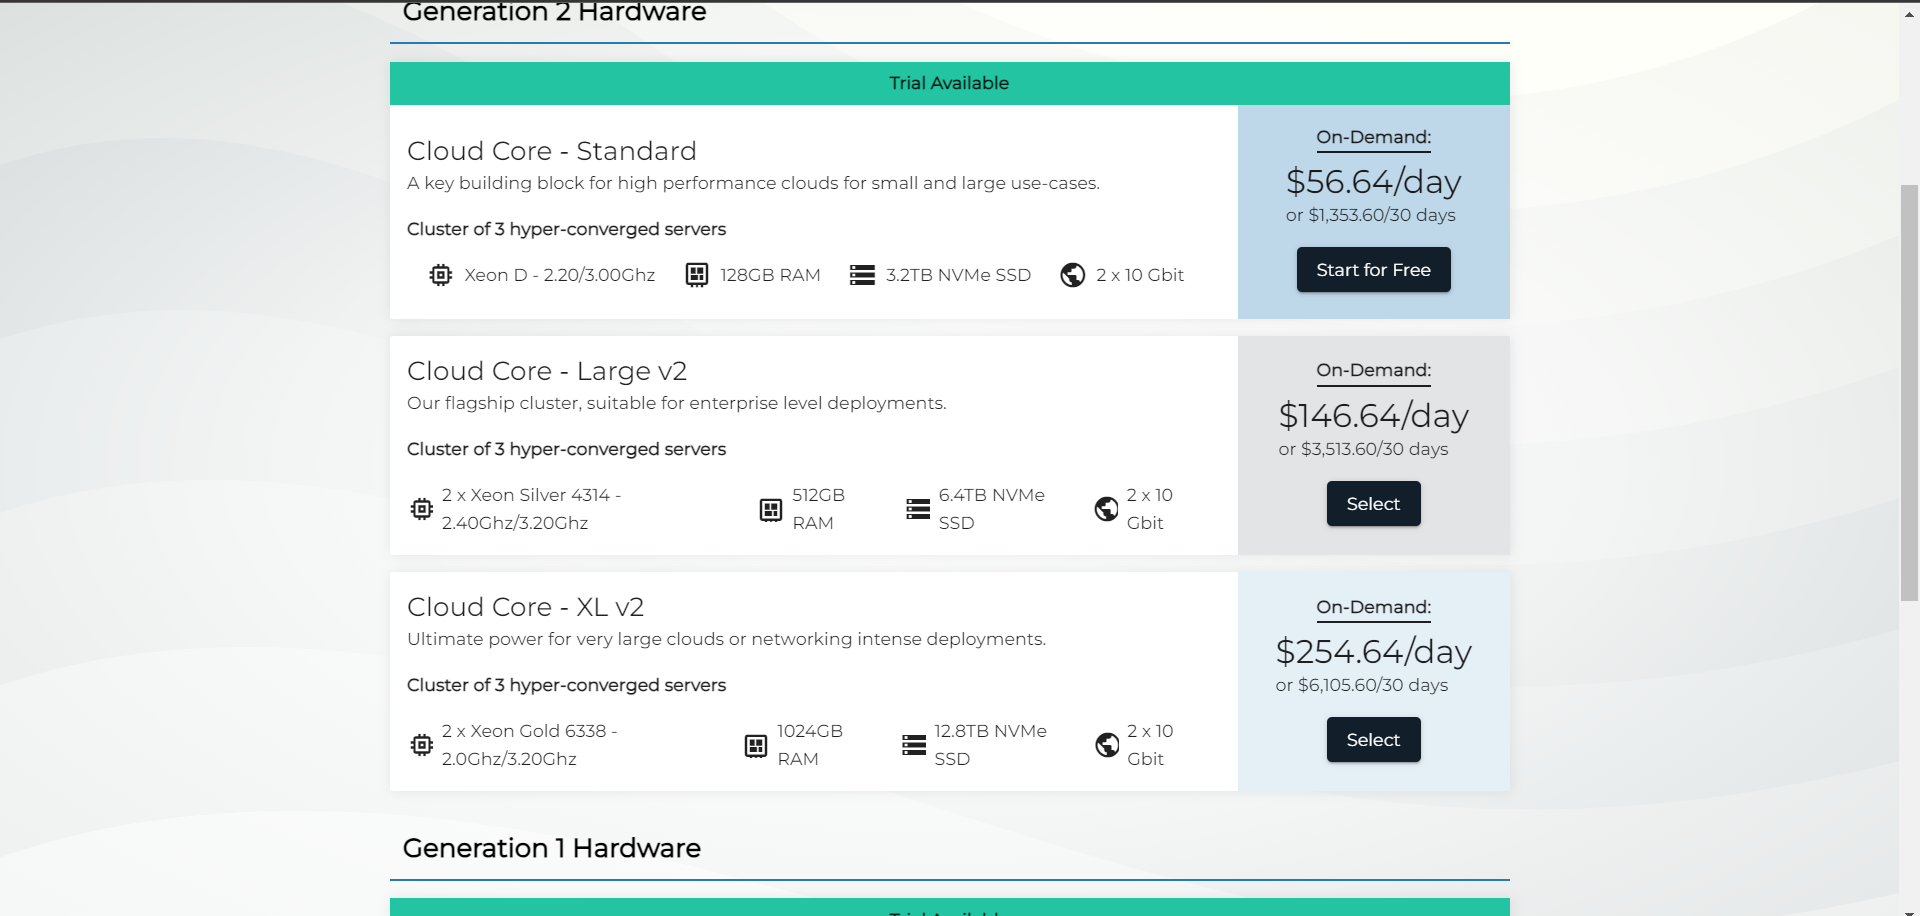
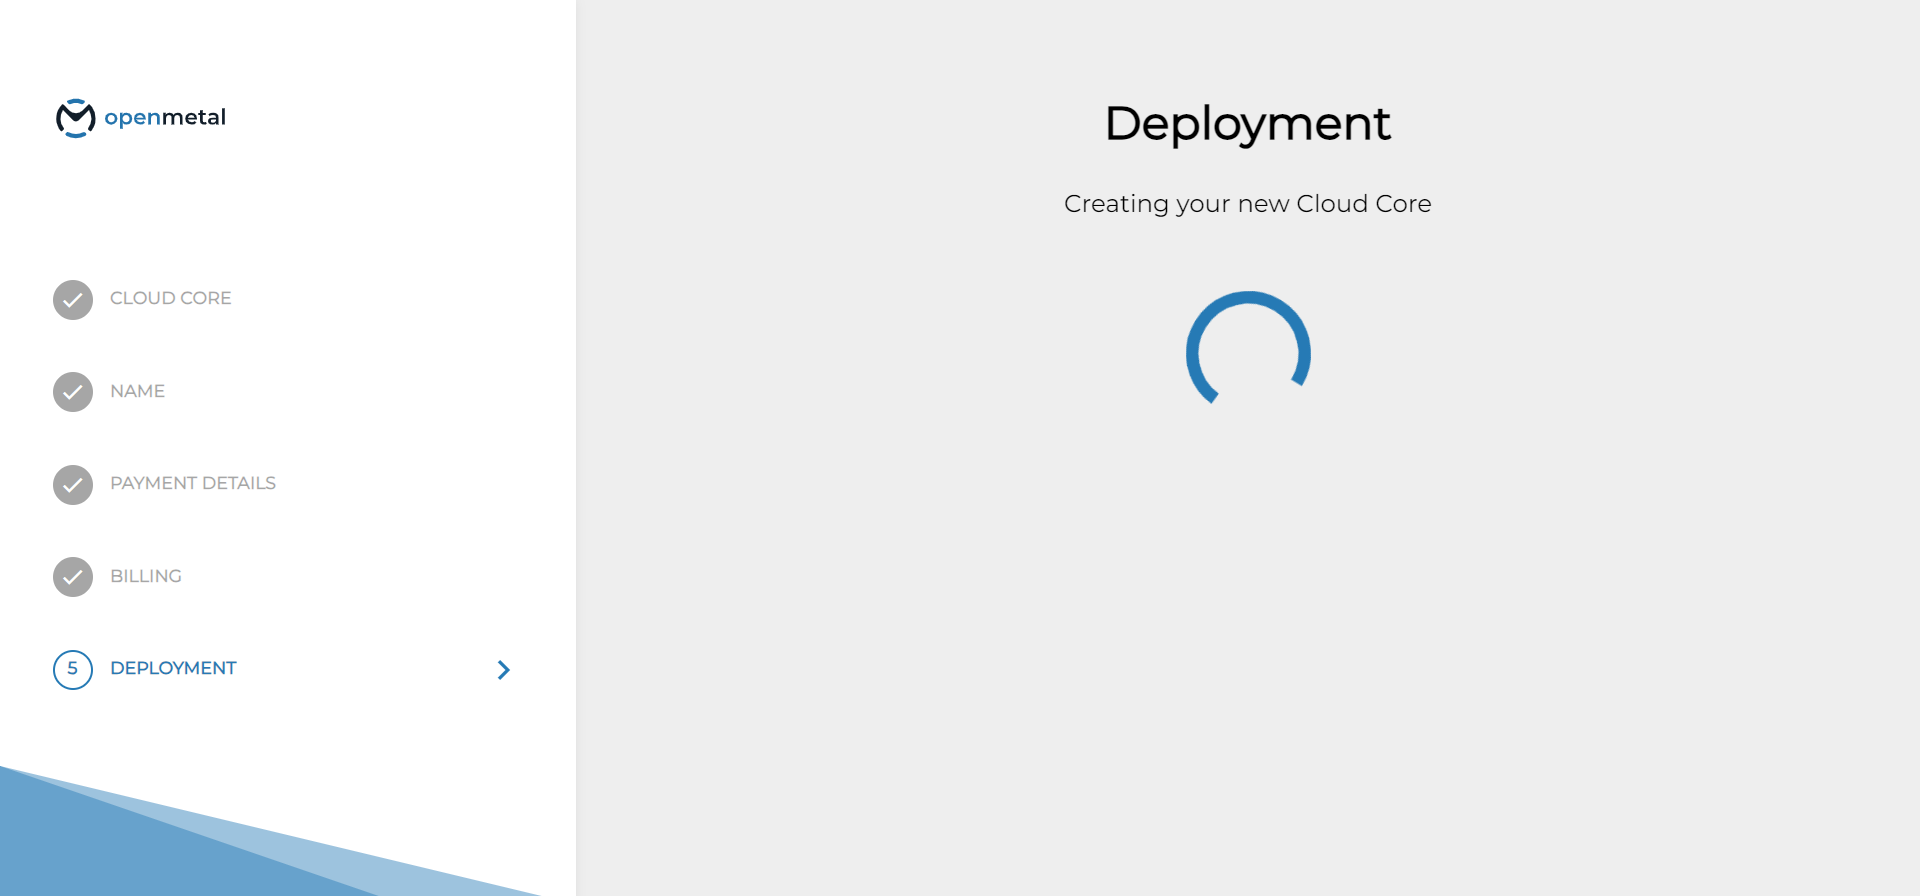
This is an important step where we have to choose our deployment type. You can read the different configurations for each deployment type. You can also choose from Generation 1 and 2 hardware. We are going to use Generation 2 Cloud Core - Standard. Click on "Start for free".
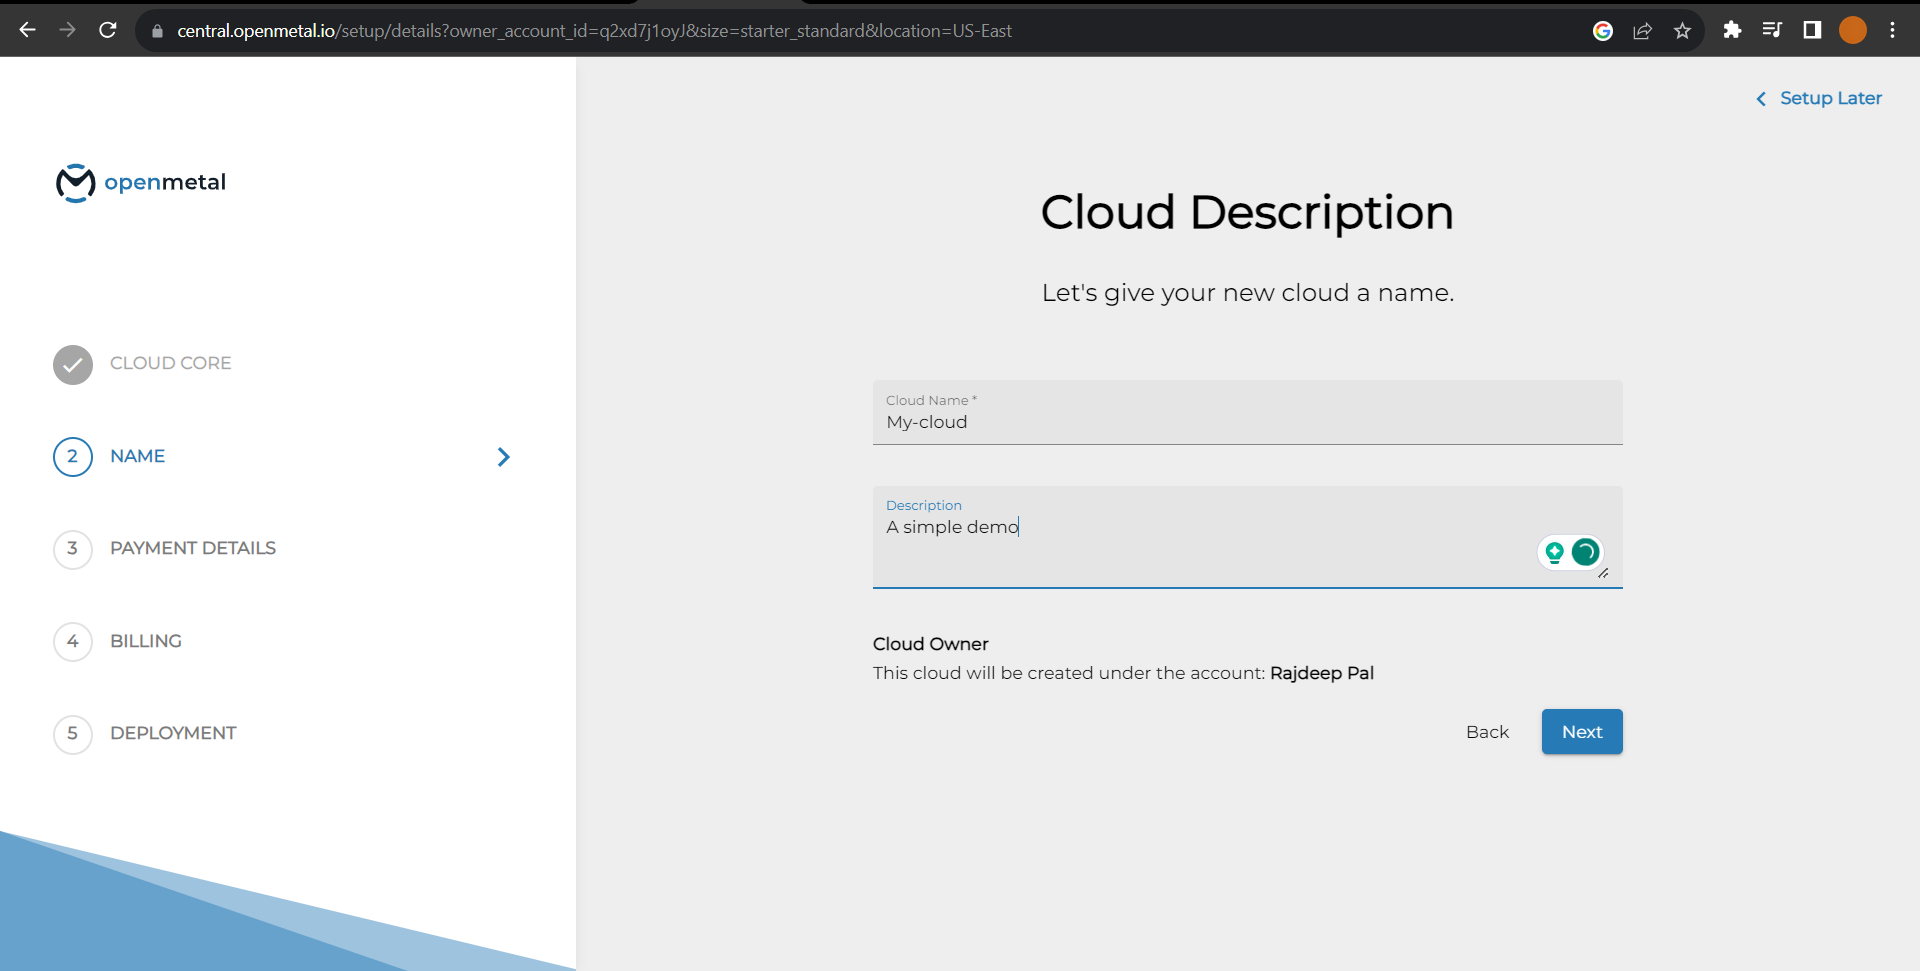
The Cloud Description page loads up. We need to provide a name for our cloud, let's say My-cloud, and an optional description. For the sake of simplicity and learning, in Payment Details and Billing, just opt for terminating the cloud after 32 hours of free trial, or if you have a credit card you can provide the details. Now, you are ready to spin up your very first Open-Source cloud on OpenMetal. Congrats !!
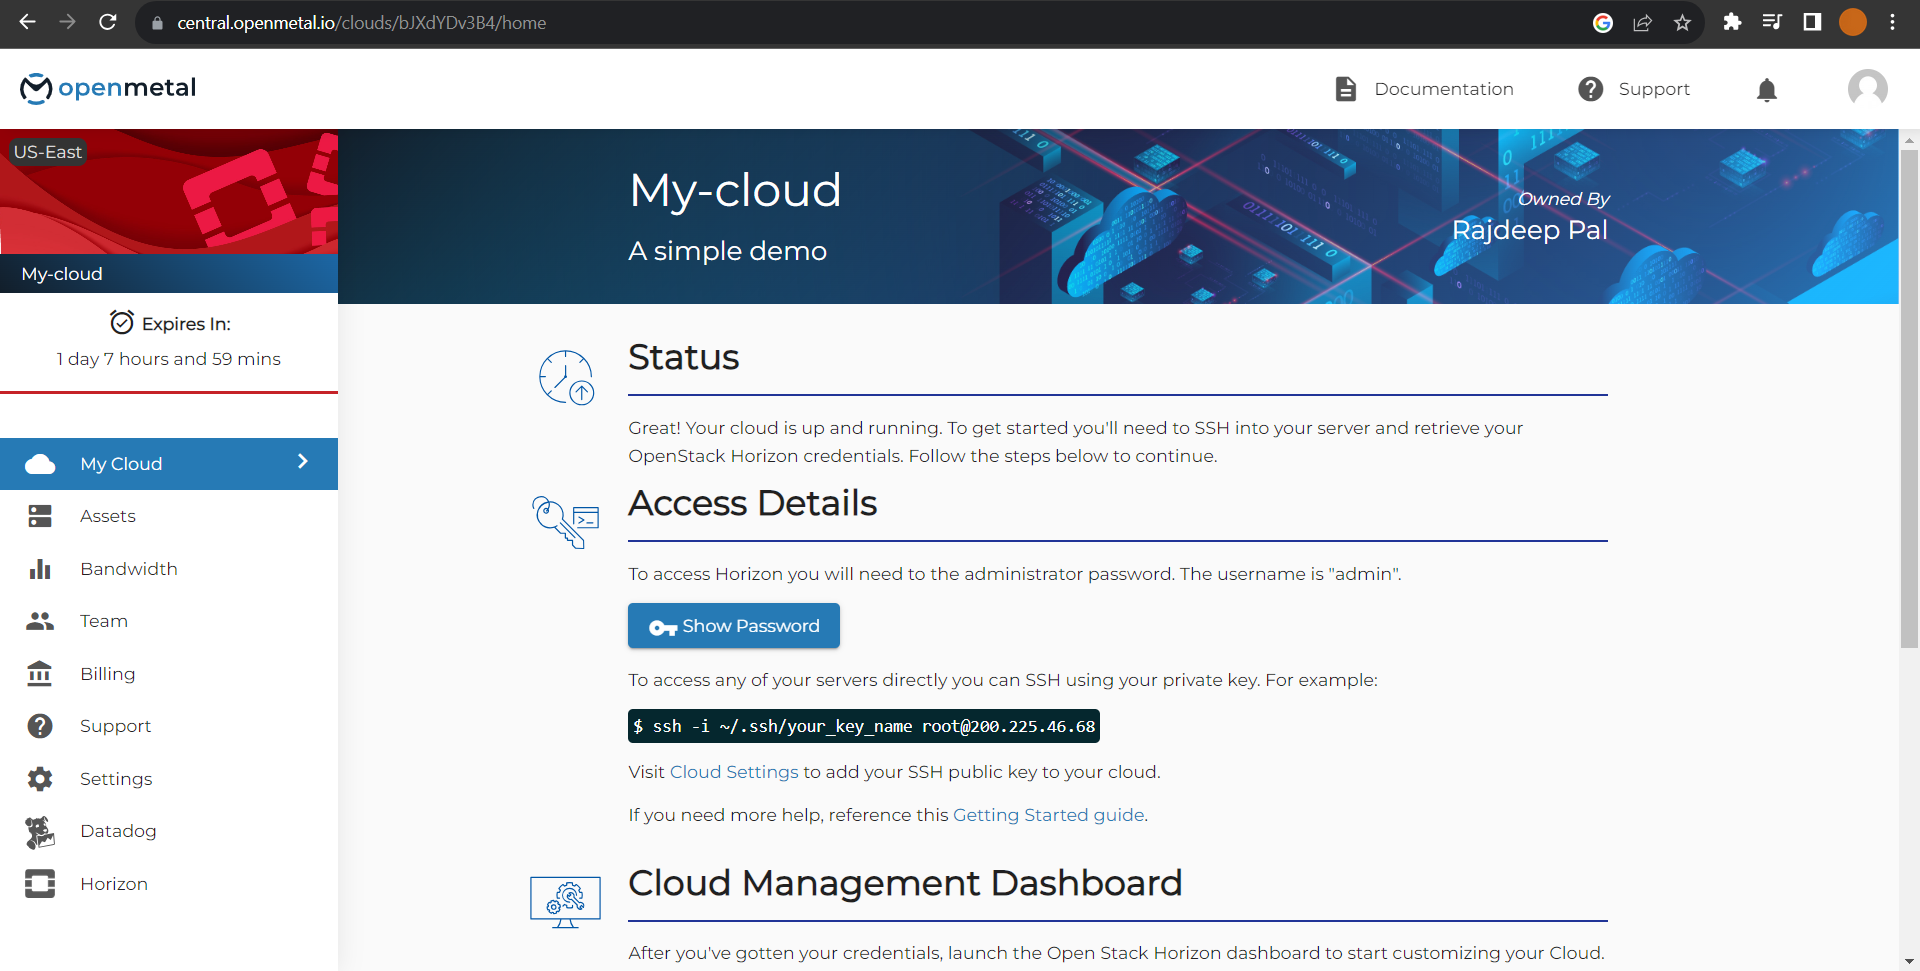
As you know by now OpenMetal uses OpenStack to provide cloud solutions, We need to access the OpenStack dashboard (Horizon) to perform various tasks. Now, there are 2 ways to access Horizon, either we jump in directly or we can SSH using a private key. As we are trial users who can only use the GUI, billed users can use SSH public key to connect.
To use Horizon, click on the Horizon option present on the left side of the interface. The login page of OpenStack asks for Username and Password. As for the Username enter "admin" and for the password click on the Show Password button under Acess Details on your deployment page.

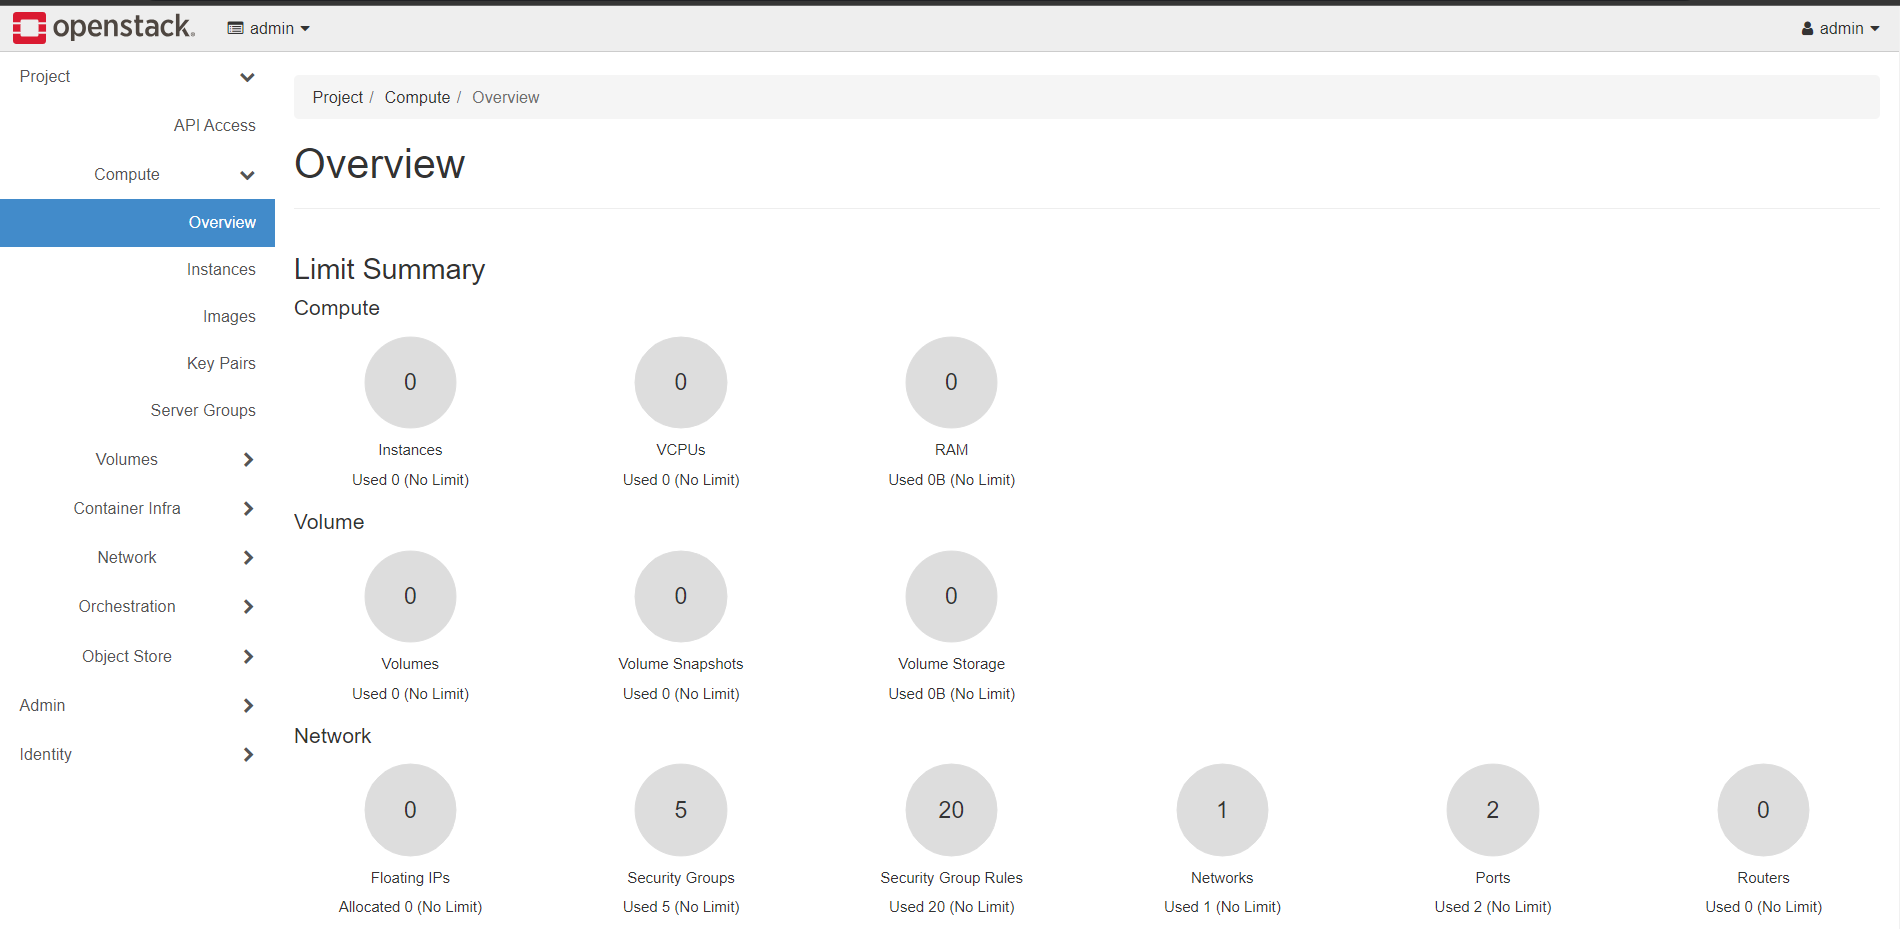
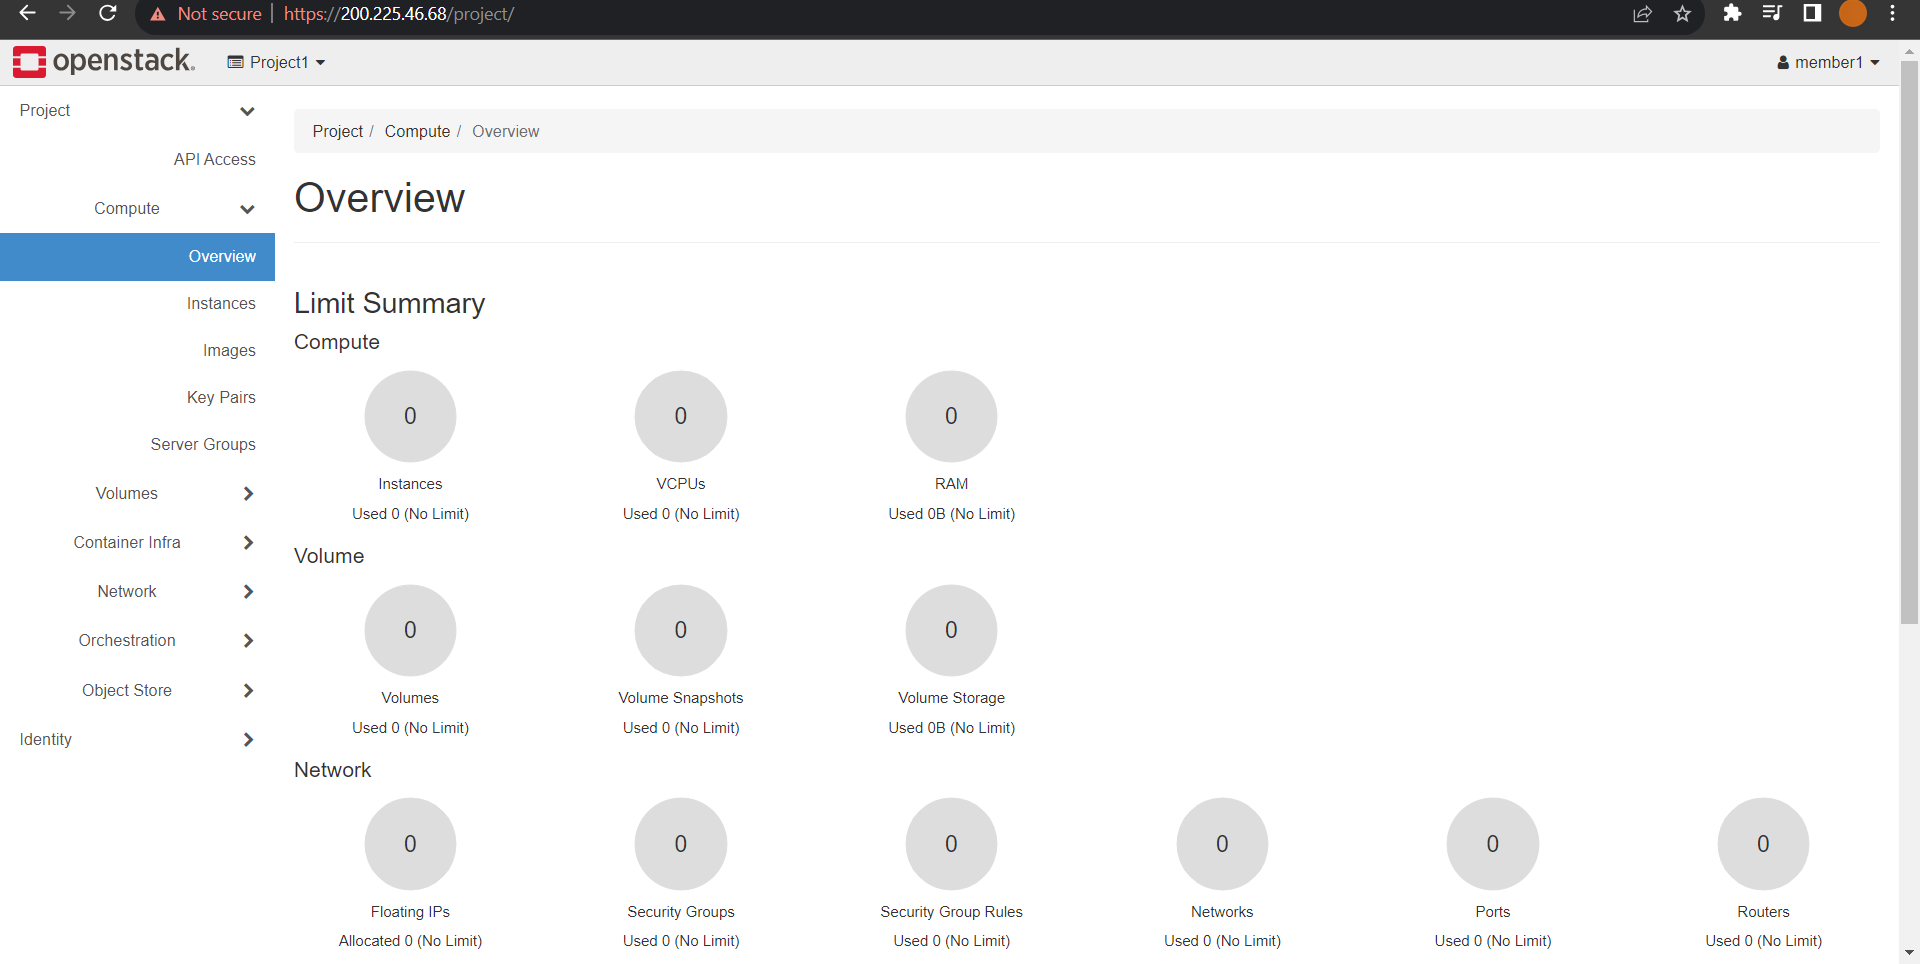
You can navigate all the resources available in OpenStack. We are going to learn 3 more simple things: creating a user, a project, and spinning up an instance.
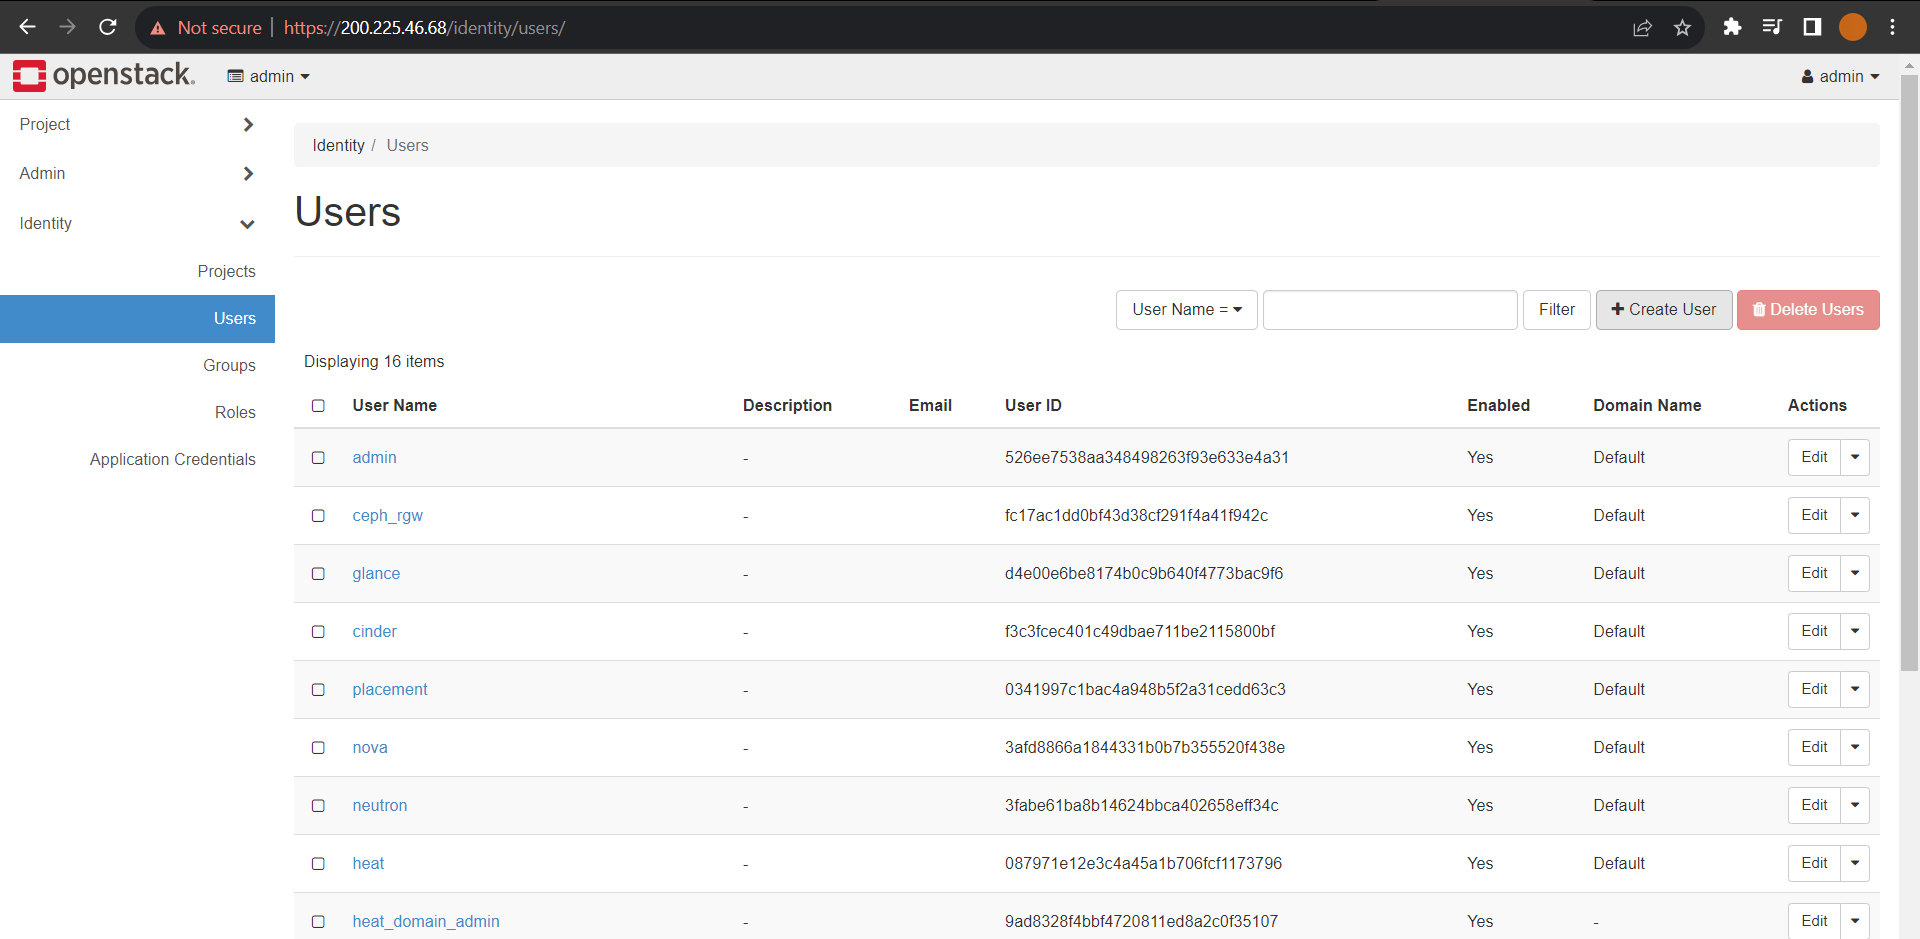
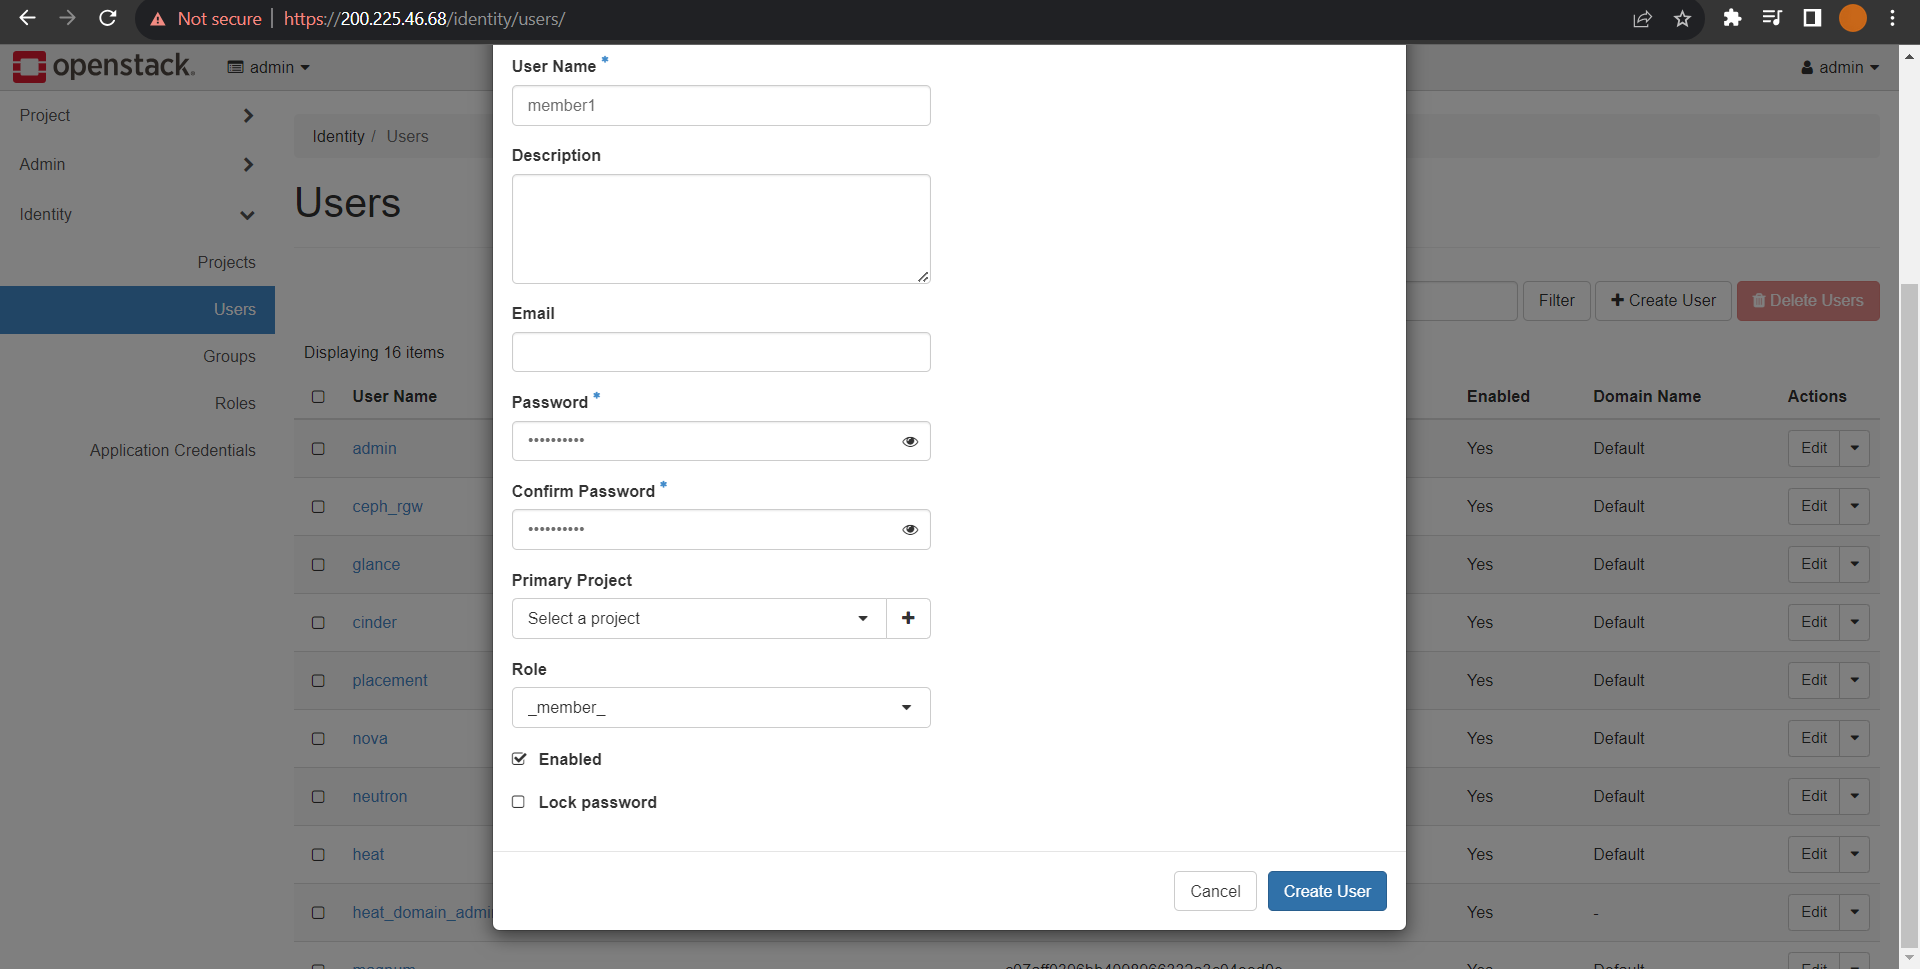
To create a user, we need to traverse to the Identity section on the left panel, under Identity click on Users, and then click on "Create User". We now have to fill in the required details such as User name, Password, Description, Email, Role, and Primary Project. Description and Email are optional. You can define what role you want to assign the user, and for the primary project, we need to create a project. Either we create a user and assign a project or vice versa. After filling in the details hit "Create User".
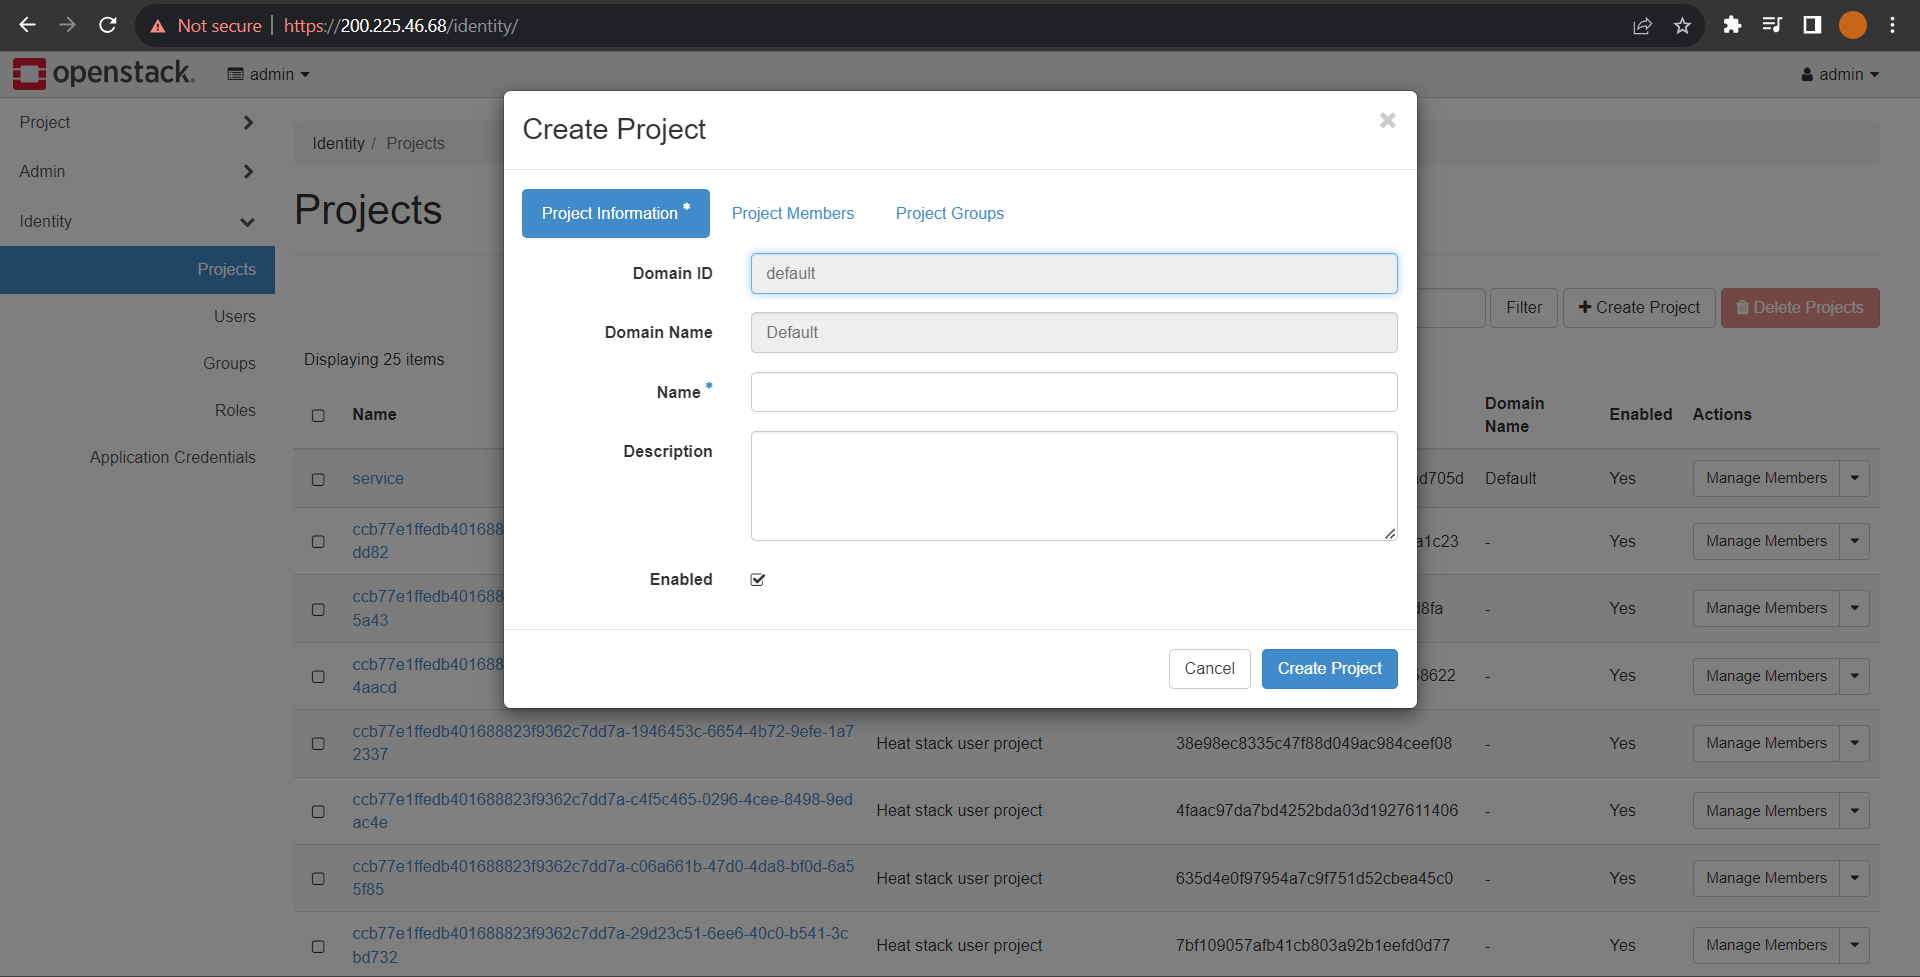
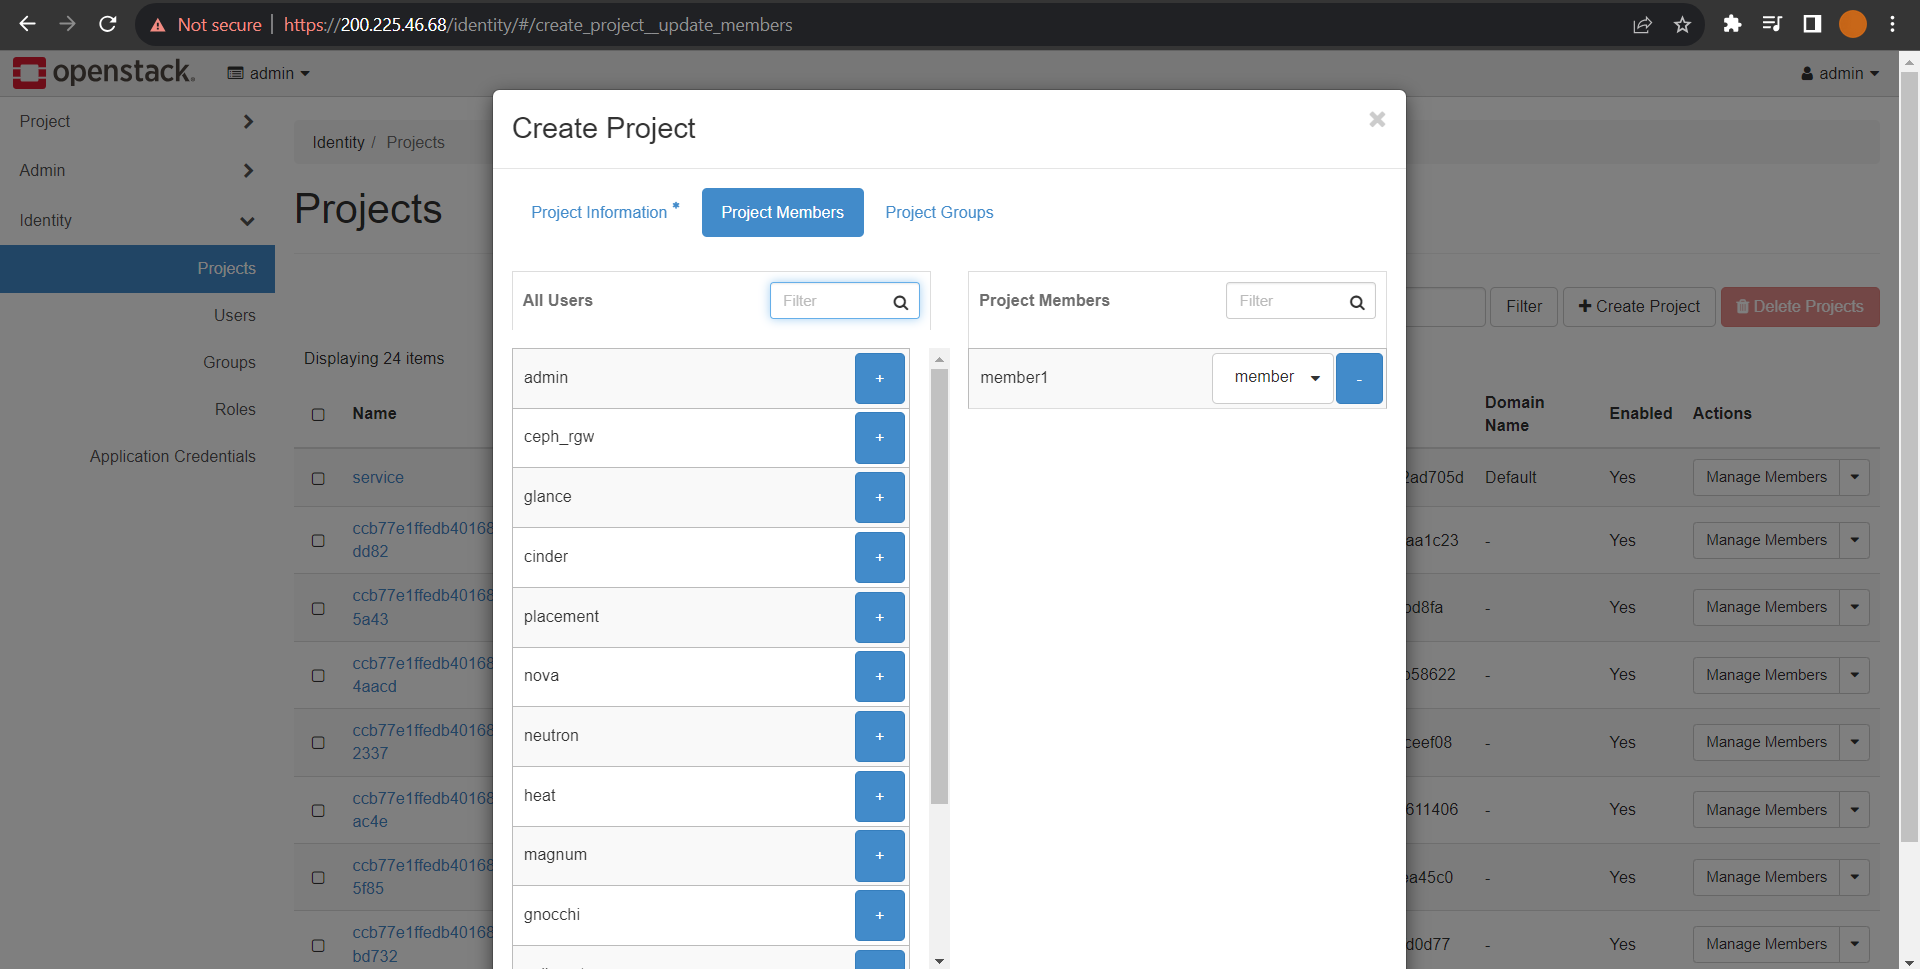
Now, let's assign a project to our newly created user. To do so, click on Identity > Projects > Create Project, and enter the name of the project, and description (optional). Select Project Members, right of Project Information, add the recently created user using the "+" from the given list, and click on "Create Project" For now, we are skipping the Project Groups, as we are not currently focusing on that topic.
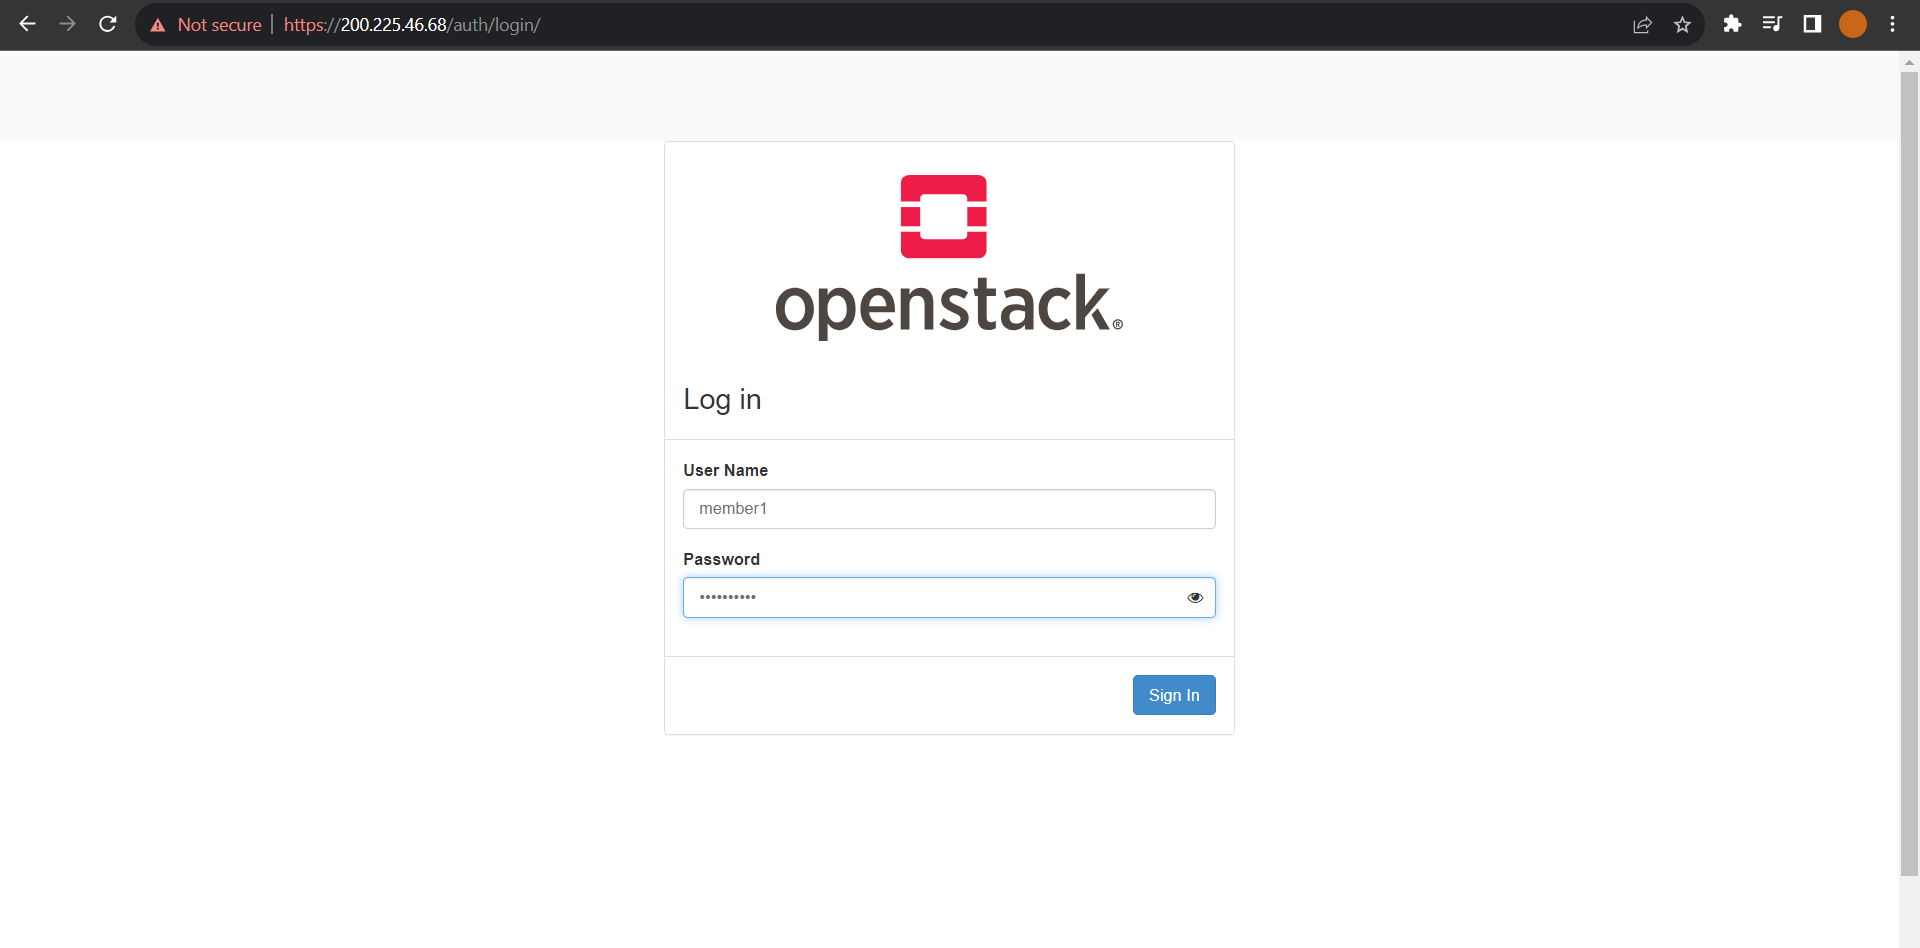
You can access the newly created user by logging out of the admin account and logging in with the credentials provided for the new user. You can also view who are you logged in as on the top right corner of the screen.
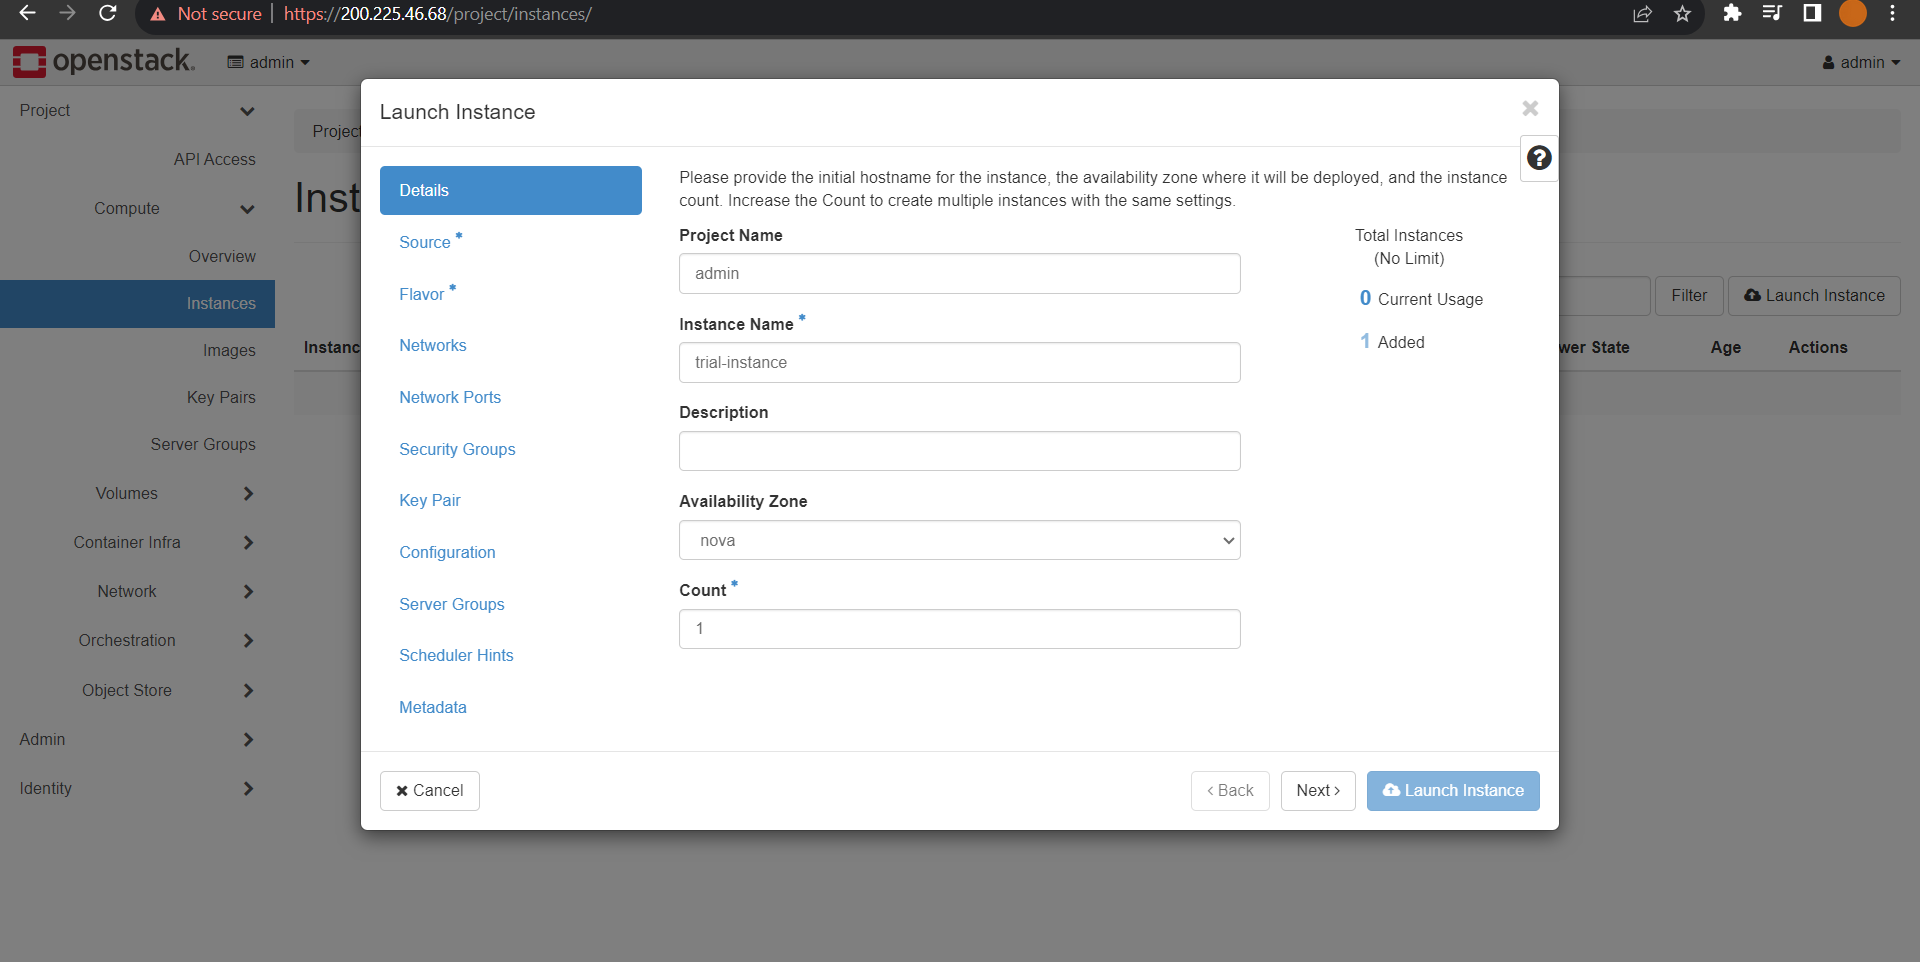
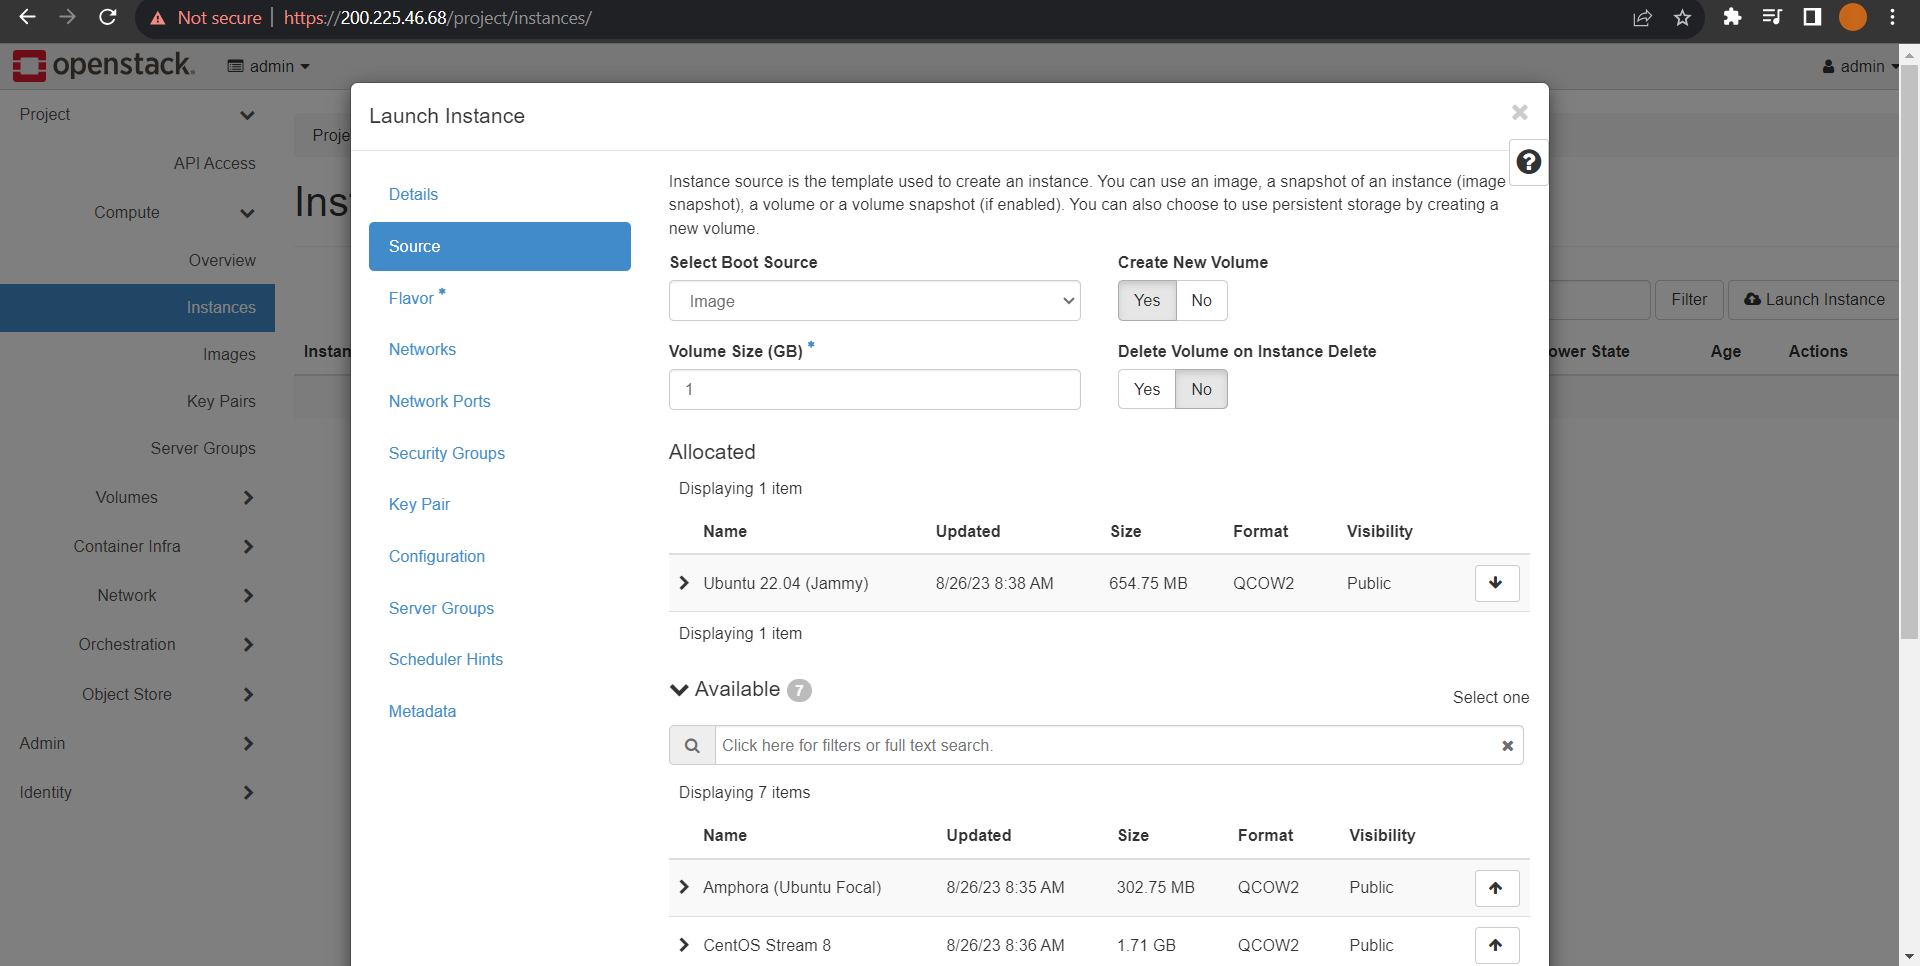
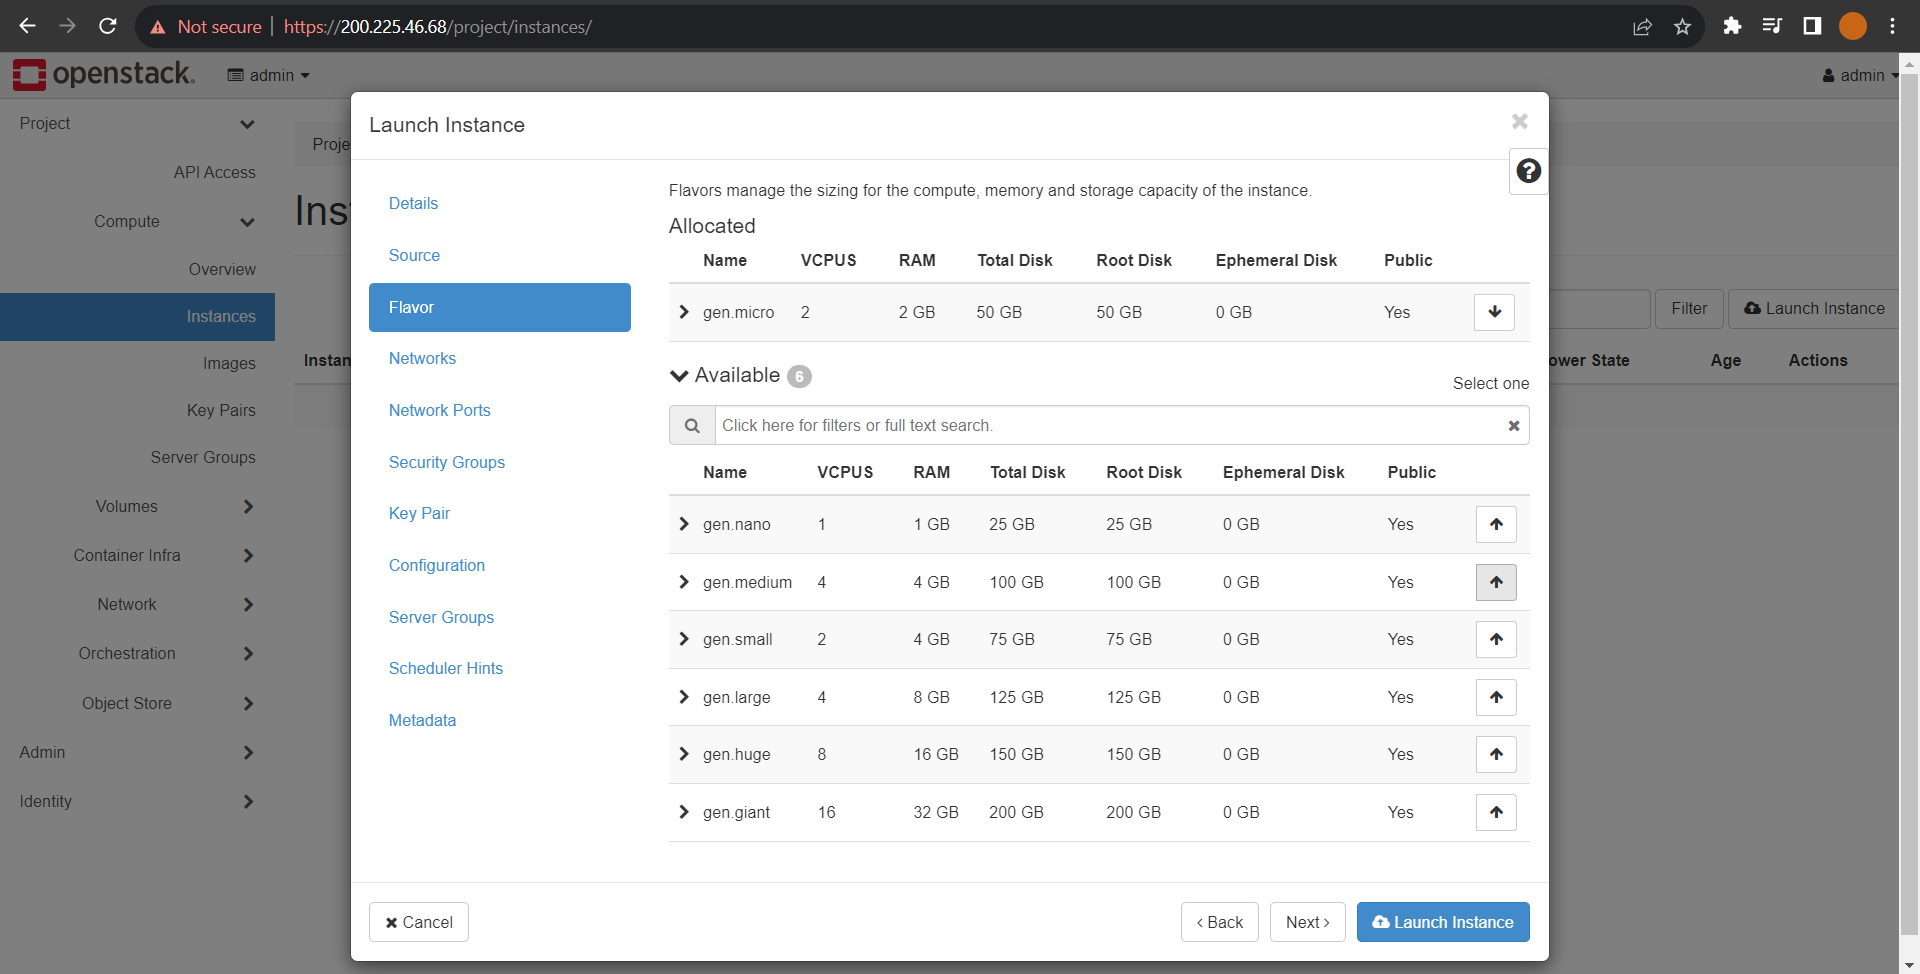
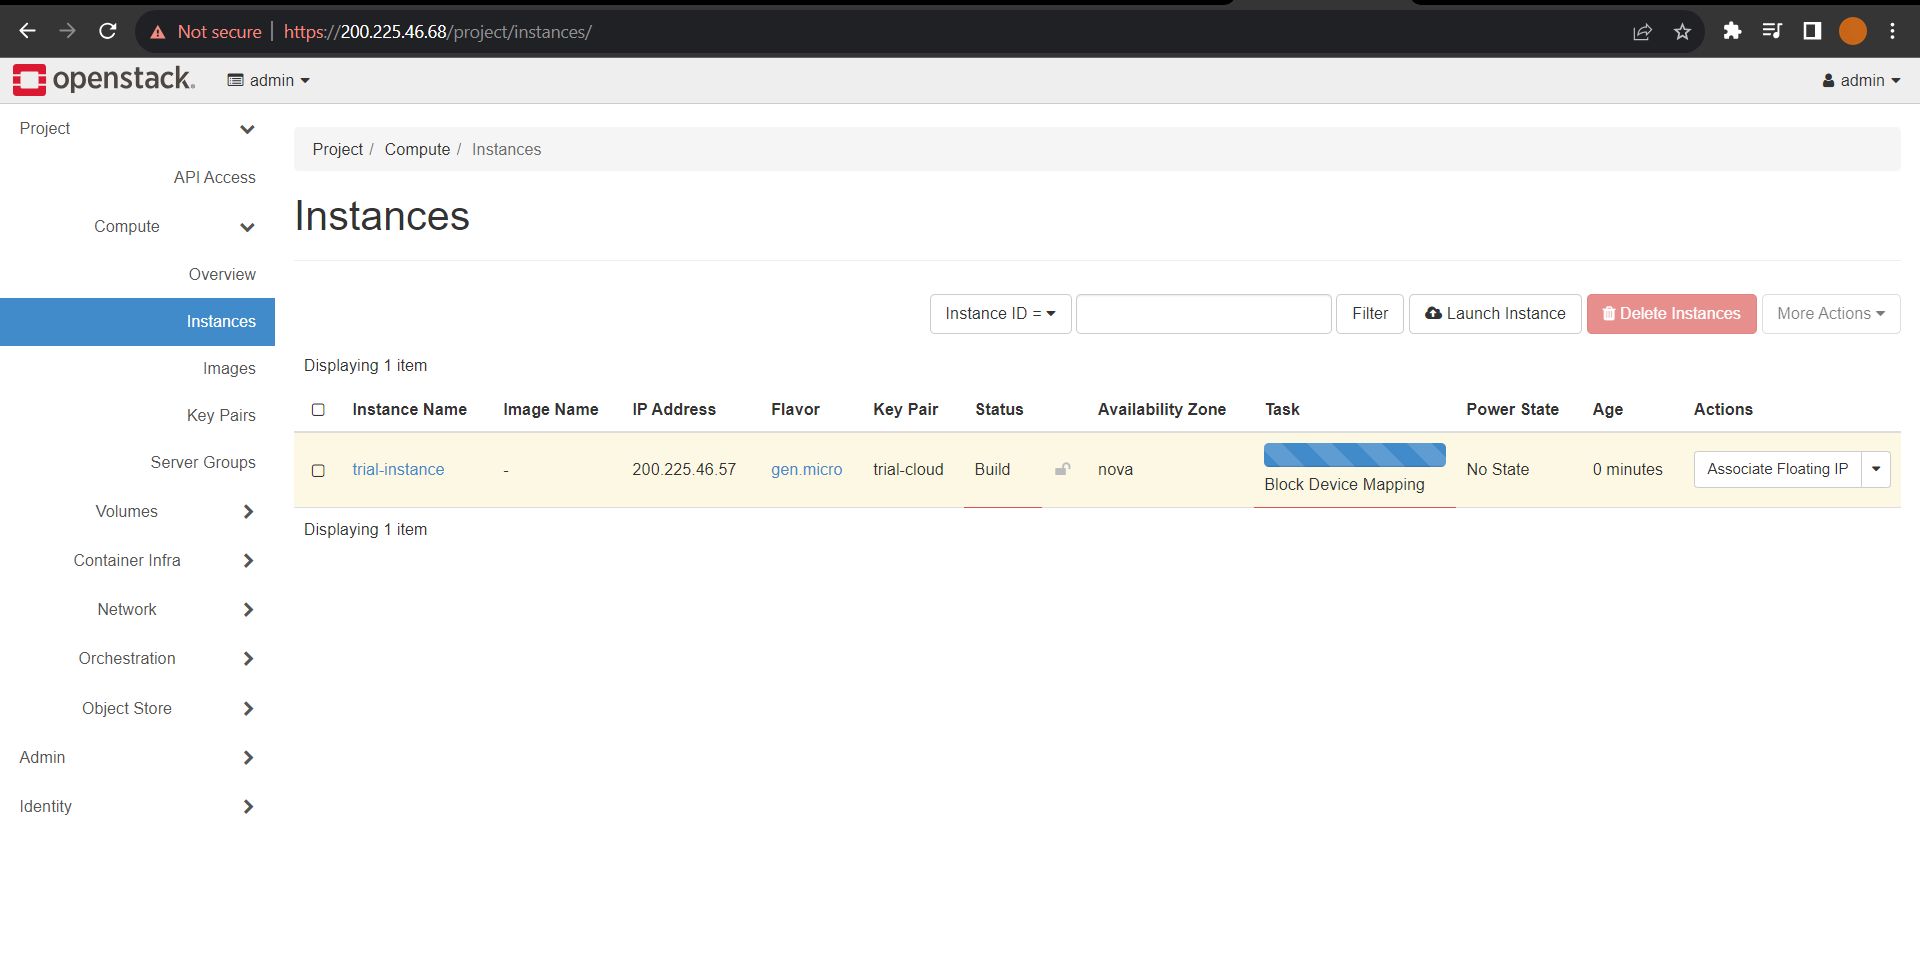
For the last part of today's tutorial, we are going to launch an instance. To create an instance, Project > Compute > Instances. Click on "Launch Instance", enter the Instance name and optional description, and the other options as their default value. Move to Source and select the image of the OS you want to use in your instance, for example, Ubuntu 22.04, and let's take 1 GB of volume size. Next, move to Flavor, and choose your preferred flavor, that is the configurations of the instance, For example, let's take gen.micro, as we are just practicing, we do not need to do any heavy computing tasks. The other customizations are available, I would like to keep them for future tutorials because these are for absolute beginners.
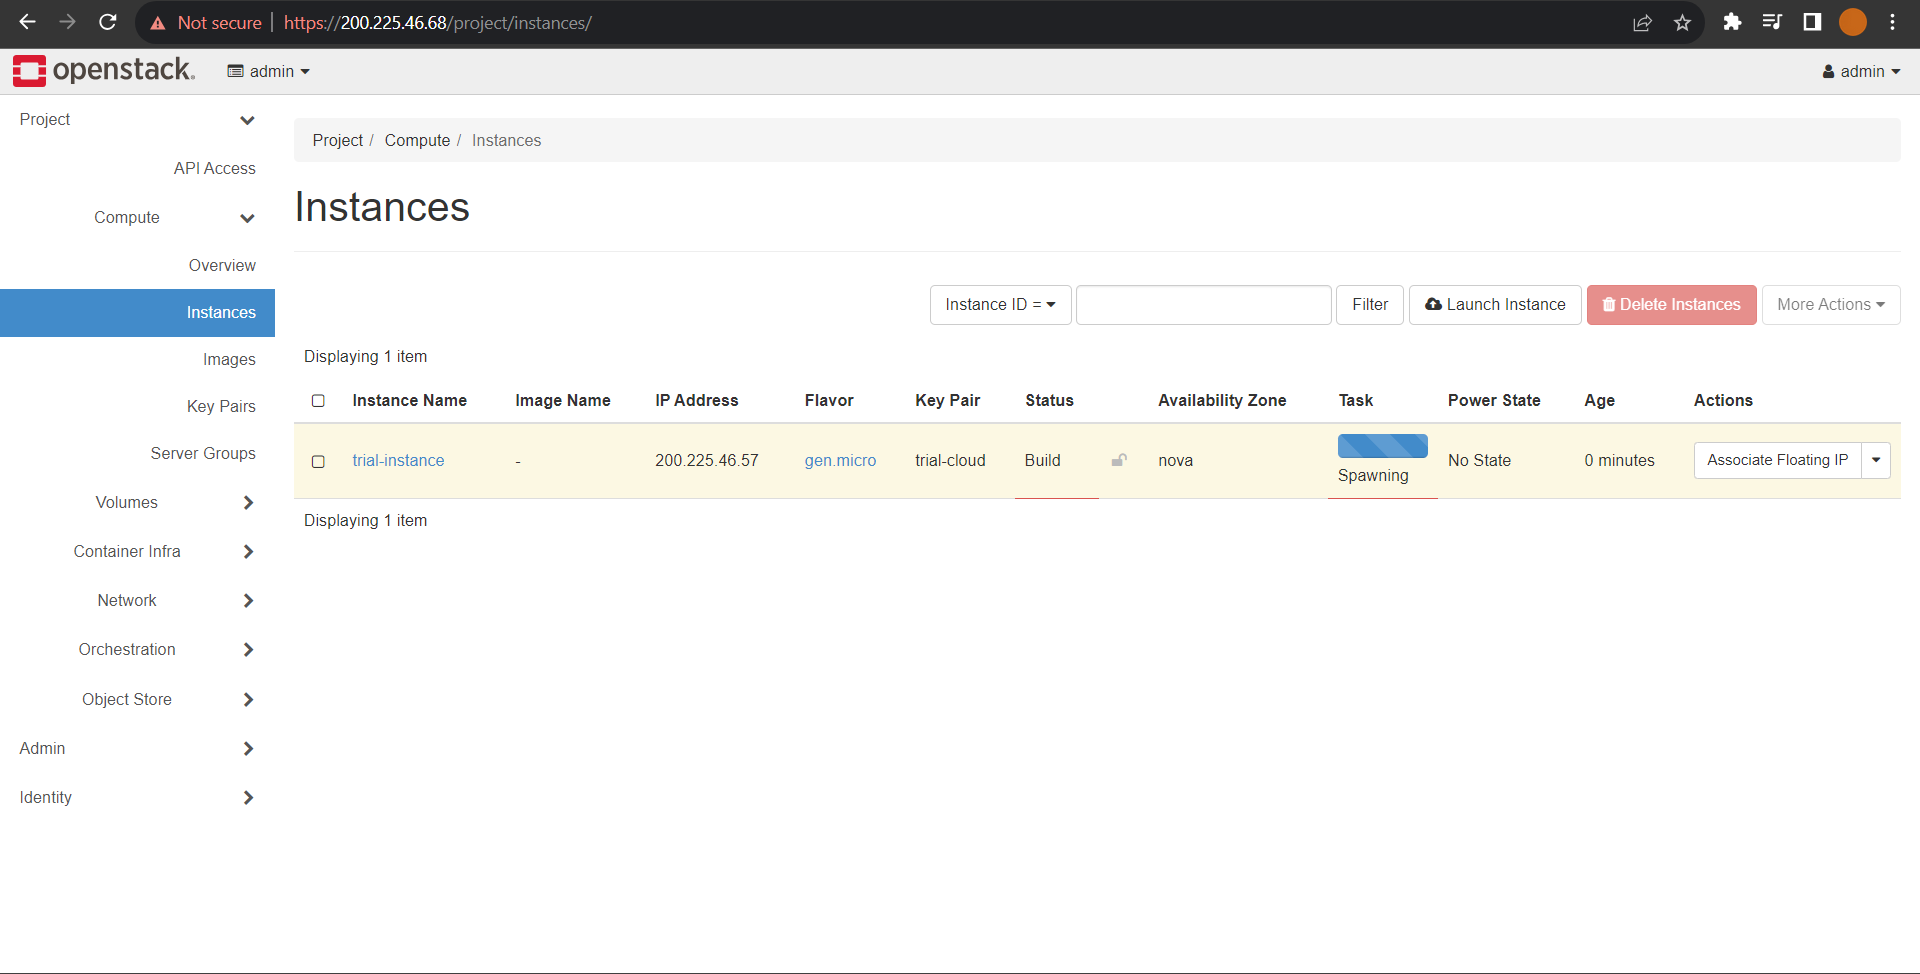
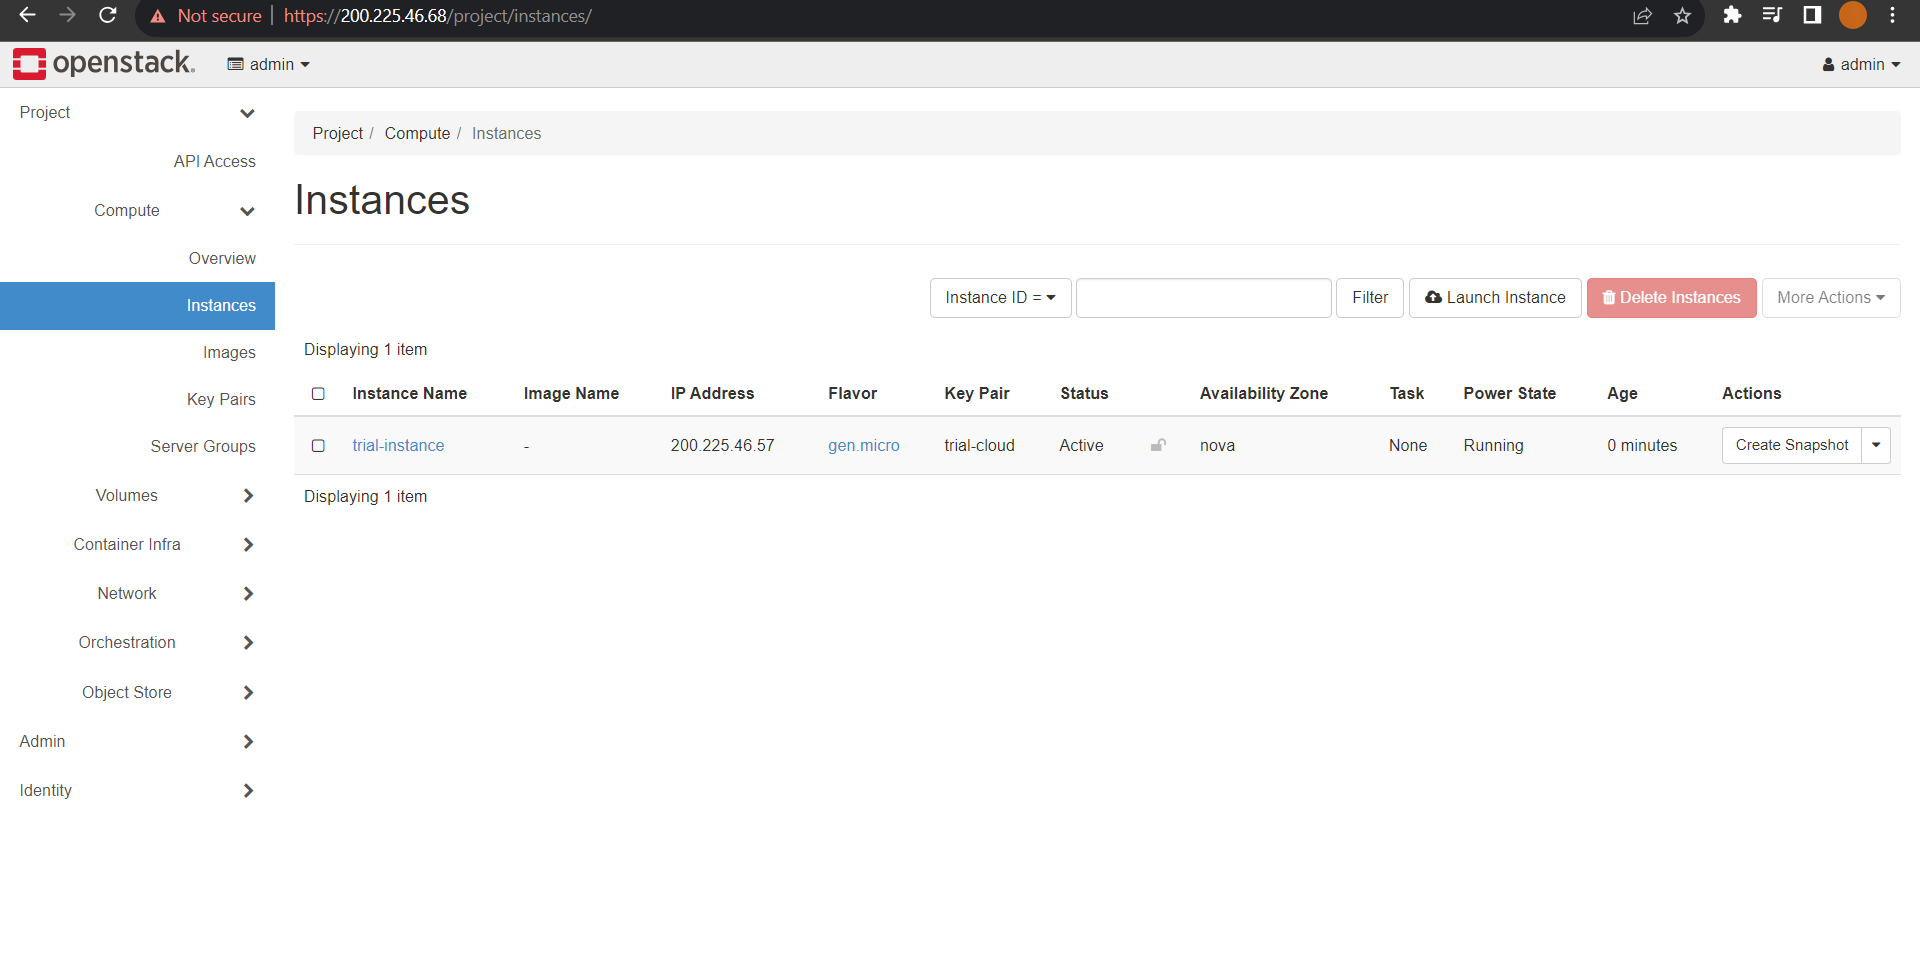
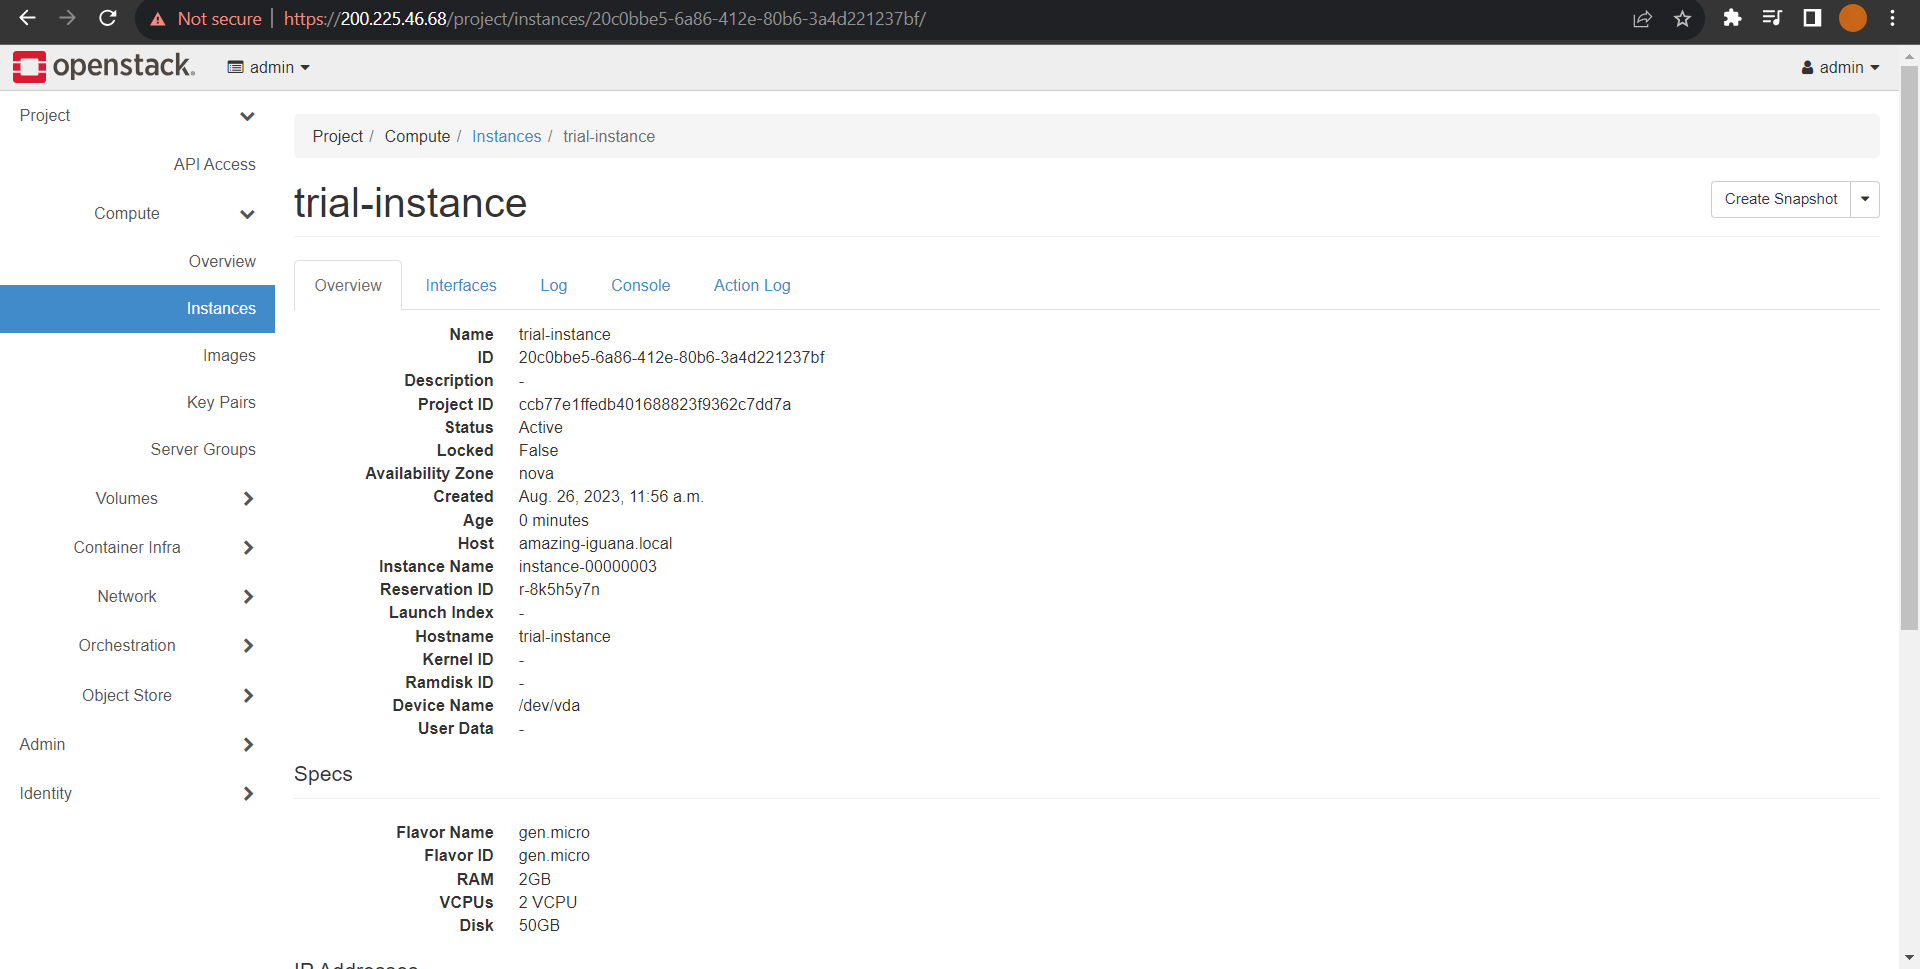
As you confirm your selections by hitting Launch Instance, the instance starts to spawn. Congratulations, you have taken the first steps in learning and creating your cloud. You can view the detailed specifications of the instance by just clicking on its name. Now, your instance is up and Running.
Conclusion
The main benefits of OpenStack are its openness, flexibility, scalability, and rich feature set. It supports a wide range of cloud services and can be customized to meet specific needs. OpenStack is well suited for organizations that want a highly customizable, enterprise-grade cloud solution but prefer to manage it themselves instead of using a public cloud provider.


